
How to Get Free Domain and Hosting for WordPress Blog Site?

By James Flarakos | October 21, 2022
Table of Contents
If you are looking to get a free domain and hosting for WordPress Blog or site, then this guide will explain to you everything you need to know.
Getting online to grow your brand, business and make money online has never been easier. Using this guide, you will not only be able to get a free domain but also free WordPress hosting to start your website for free right now!
What Do I Need to Create a Website?
Before we get into how you can start your free WordPress hosting and get your domain, lets first go through what you need to get online.
Having your website online takes 2 components. The Domain registration to register a domain name of your choice. Example www.mydomain.com. And once you have your domain you need somewhere to host the site. By building a website on your WordPress hosting you can then connect the domain name to the website you developed on WordPress.
Once both are up and running and you have many the connection via the nameservers, it means anyone clicking on your domain will be brought to your website you designed and linked from your WordPress.
The Cost of Domain Registration and WordPress Hosting
Let’s start with the price of Domains. These vary with different domain registrars, with some ranging all the way up to $50 or more per year. You can also get cheap domains for as little as £3.65 with SeekaHost.app if you prefer to be more secure with your domain as free domains can have some cons which we will go through shortly.
Hosting can also vary, our smallest package starts at only £1 pm but some hosts charge as much as £20 monthly for hosting, this can also include extras if they charge for features like SSL, emails and other needed features to any website.
Meaning that per year this can become costly, and this is exactly why we have found the perfect way for you to host your website and register a domain for free!
How To Register a Domain for Free Using Freenom
![]()
Before we get the free WordPress hosting we need to need to get the domain. Log on to Freenom and create an account, alternatively you can sign in with either Google or Facebook. From here we can get our domain by following the steps below. Please be aware that sometimes the website might time out, take time to load or other small well-known bugs such as not registering your domain the first time. These unfortunately are the cons of getting free domains, the website works but can be improved. However, it’s just the domain we need so let’s go through the guide.
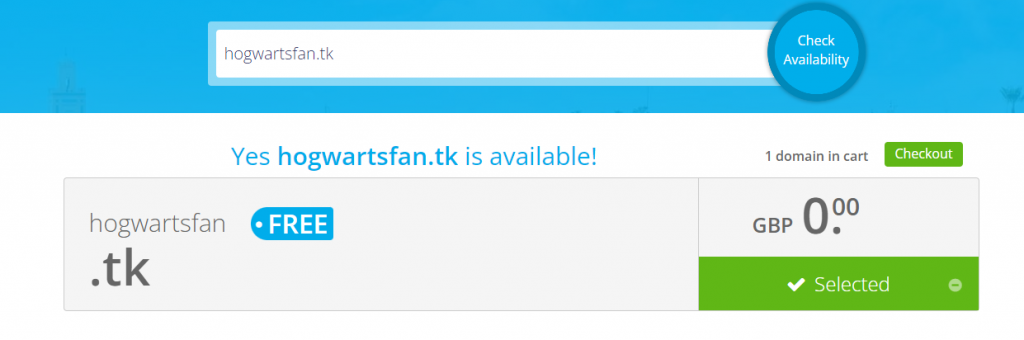
- Once logged in search for the domain you require using the search bar on the homepage.
- Pick the domain ending you want on the next page. If this shows as taken, simply type the entire domain with the ending in the search bar and it will show as available again.
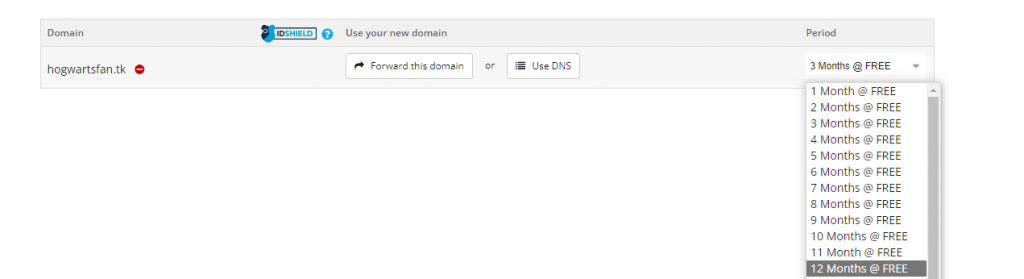
- Follow the steps to register you domain for free, it won’t need any payment details. Just your details and an account to use with them. Also make sure to choose the maximum free term of 12 months.
- Once registered, you can then leave this screen up as we will need it shortly to add your custom nameservers.
Errors That Might Occur
Domain taken – This usually happens when you first choose your domain and it says it’s now taken, to solve this just type the entire domain including the ending. eg if mine was, “mydomain.tk” I would type the entire address in the search bar rather than only “mydomain” this will now show as available unless it really has been taken.
Domain Not Registered – Often this will happen if you login during registration, the best thing to do is sign in first, then try to re-register the domain once already signed in to solve that problem.
How To Get Free WordPress Hosting
Now we have our domain, let’s get it hosted so we can start editing and go live with our website! This new service by SeekaHost to make sure that anyone can get online that needs too. With normal life expenses getting higher and higher by the day this new scheme will make sure that anyone no matter what their earnings will be able to get online.
There is no need to worry for re occurring expenses, as like Freenom there is no payment details taken, just your account created and that’s it! You can also take a look at the features you get with the SeekaHost dashboard and scalability is always made easy in case your website does grow in popularity and size.
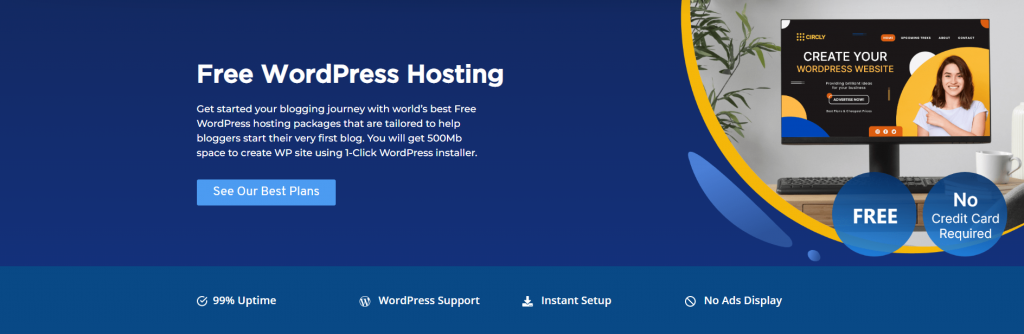
- Visit our Free WordPress Hosting page and work your way down to the free WordPress package.
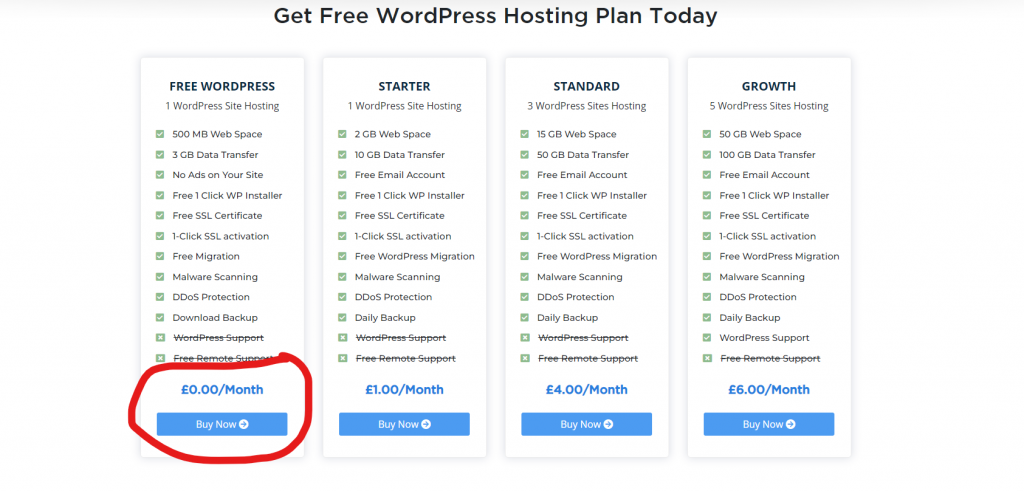
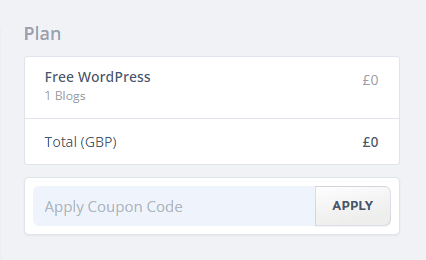
- Choose the package and create an account with us its FREE! Once created you can then subscribe to the free package, no card details are needed.
- Once subscribed, and from your dashboard choose the WordPress hosting option on the top to create your WordPress website.

- Now choose the “Create WordPress Site option to get started.

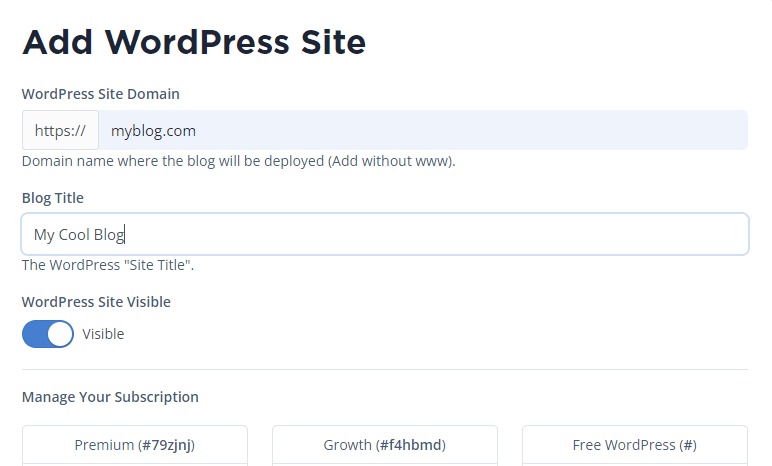
- On this page type in your domain name (without the www.) a blog title, choose your blog visibility and then choose your free hosting below.
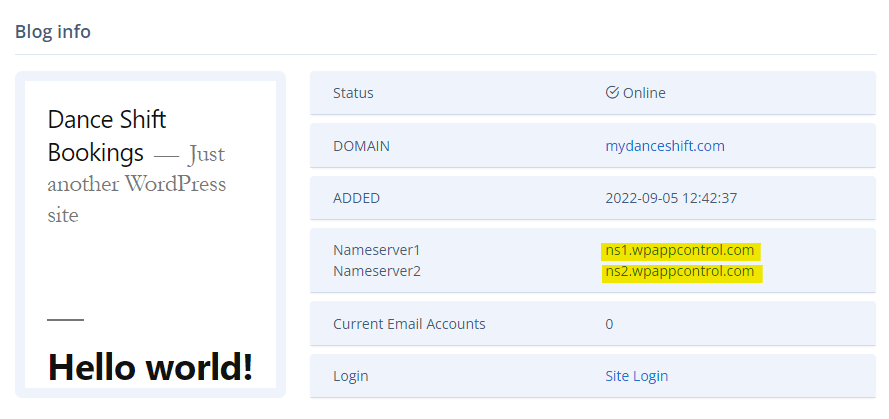
- Now your almost done, this will load for a few minutes and just wait until you have the “Online” notification on the left.

- Once online, click the blue button (the cog) on the right side and here you will find the two nameservers you need to copy.
Finally, it’s time to connect our hosting to our domain and get editing! This is done in only 2 more steps, bare in mind if you didn’t follow the first part as you already have a domain elsewhere, just find your “manage domain” option and follow the same steps.
How To Connect Your Free Domain to Your Free Hosting
Now the important bit, how to connect both domain and WordPress hosting together. If you followed our tutorial on freenom in the beginning, you should be ready on the manage domain option of your dashboard. If you’re not using freenom just locate the “manage servers” area and then choose “nameservers” the rest of the guide will also work for you.
- Go to your domain section on freenom to find your registered domain.
- Now select the manage domain option.

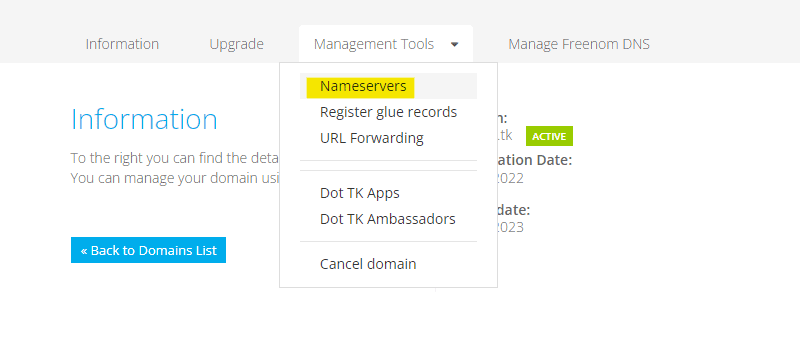
- On this page hover over “Management Tools” and select nameservers.
- You will see this page, now keep this page active and go back to your free WordPress hosting and copy and paste the nameservers 1 and 2 into the corresponding sections.
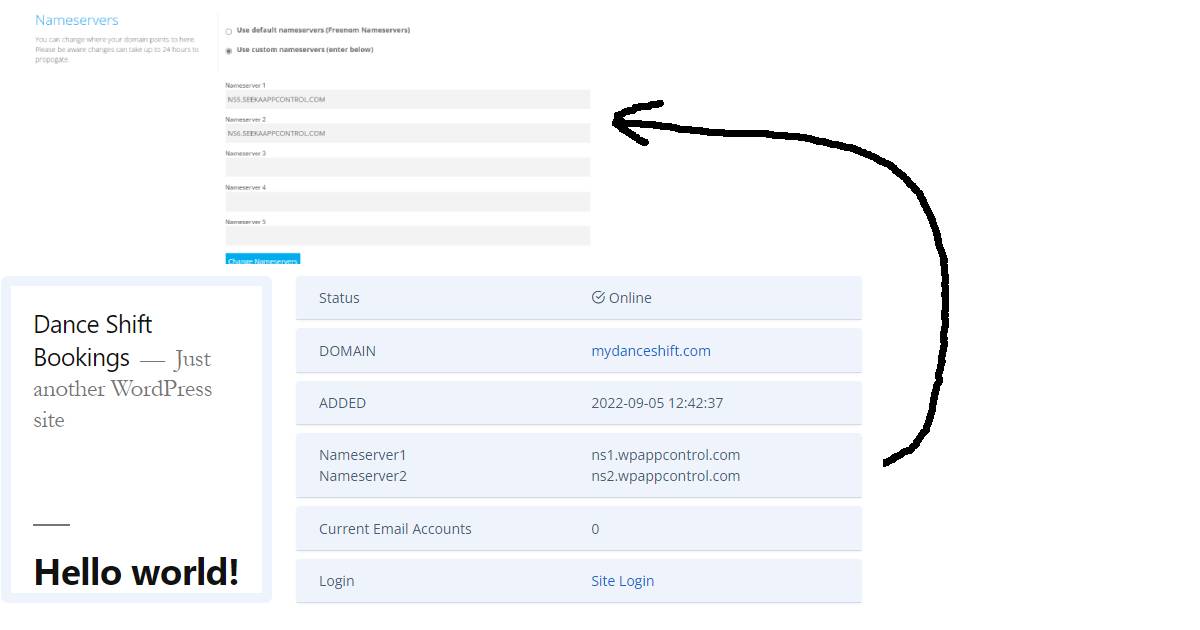
- Now you can press “change nameservers” and they will start to propagate. This means making the connection between hosting and domain.
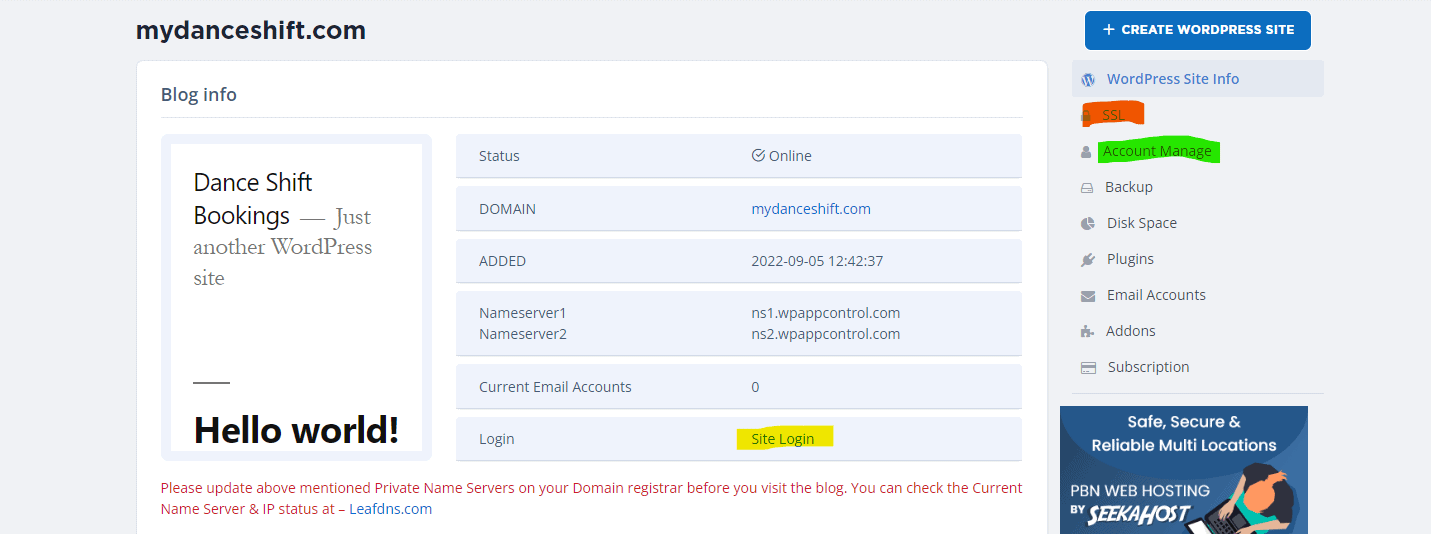
- Finally go back to your SeekaHost dashboard and you can activate your SSL certificate and log in using your Account Manage to get your login details.
Final Thought
This can suit so many needs, from students that are looking for free methods of getting a website, small business that want to see how much it helps to be online, or anyone wanting to learn how to design on WordPress. This gives you the perfect opportunity to learn how to design on WordPress for free. Just be aware that the freenom domain only stays free for 1 years, so we do suggest getting a cheap domain instead, so you know that you’re not breaking the bank but have total security of domain plus your free WordPress hosting that hasn’t got any expiry time.