How to Update Nameservers In The SeekaPanel For A WordPress Site

By James Flarakos | July 28, 2021
How to update your Nameservers Using SeekaPanel to connect your Domain to your WordPress Hosting. We will be using the SeekaPanel which is the SeekaHost’s custom build unique WordPress hosting control panel.

Introduction to Updating Nameservers For WordPress Hosting
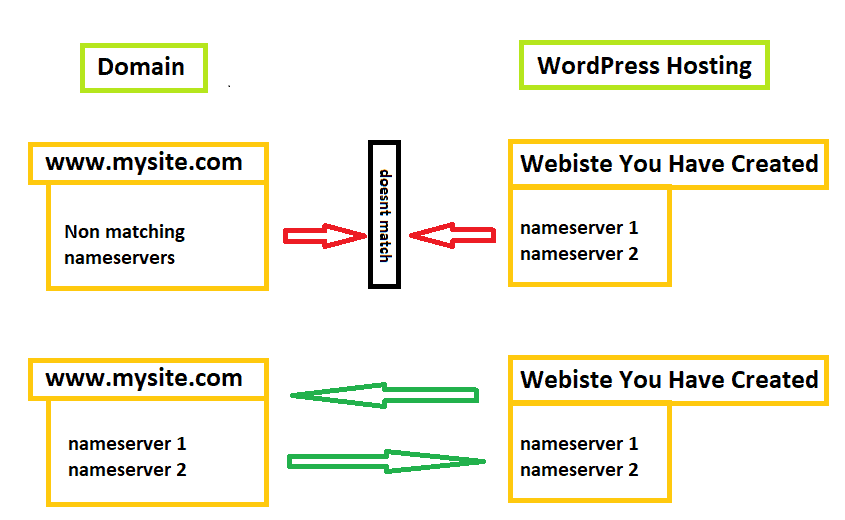
An important part of connecting your Domain to your WordPress site or blog is to update the nameservers on the Domain. All domains need to be connected to a host that you hold your website on. This will mean than when someone searches your domain, they will be directed to the website your have built. To do this we use the nameservers provided by the WordPress Hosting and then input them in to the domain.
Once both nameservers match for the domain and the hosting the link is now created so that my searching your sites address, it will lead you quickly to your website you have created for that domain.
Step By Step Guide to Updating Your Nameservers
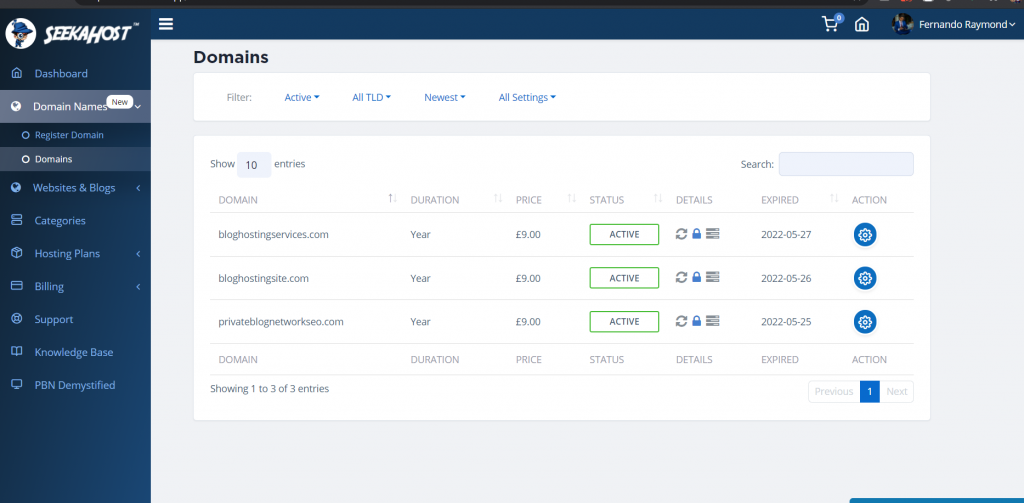
- First, go to the domain section of your SeekaPanel Dashboard and select Domains.
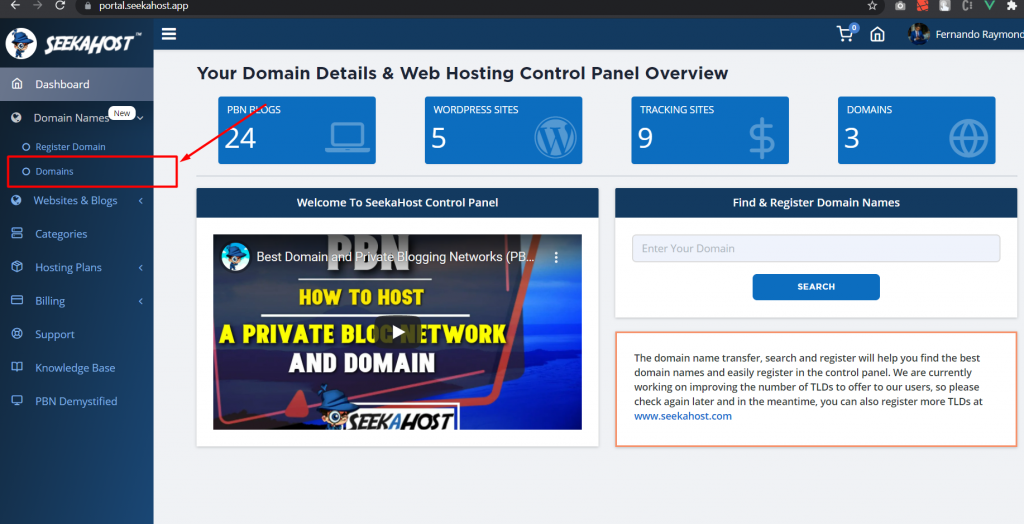
- Navigate down to the domains page to bring up your current domains. These are all the domains you are currently subscribed too.
- Select the domain action for the domain you want to modify.
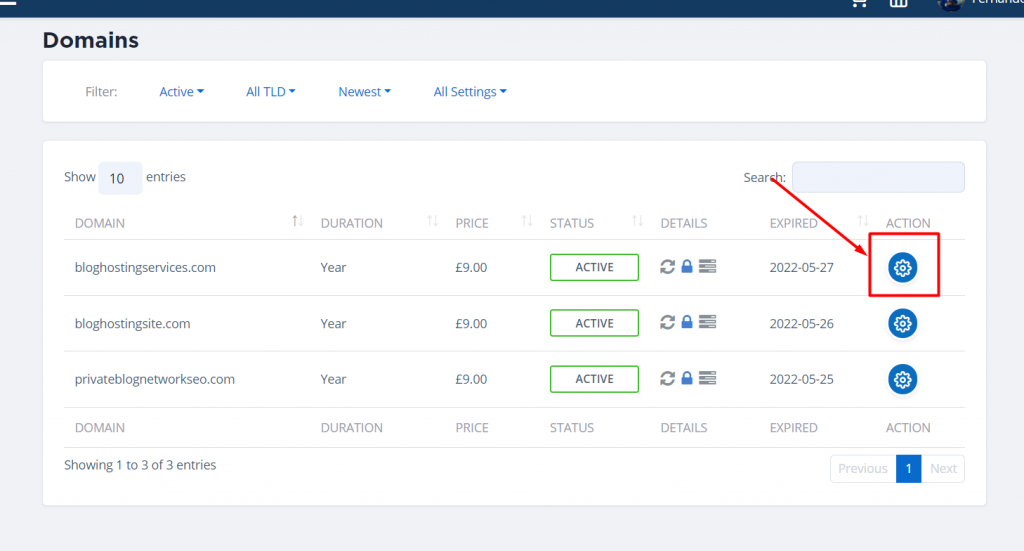
- You will be directed to the overview page for your domain.
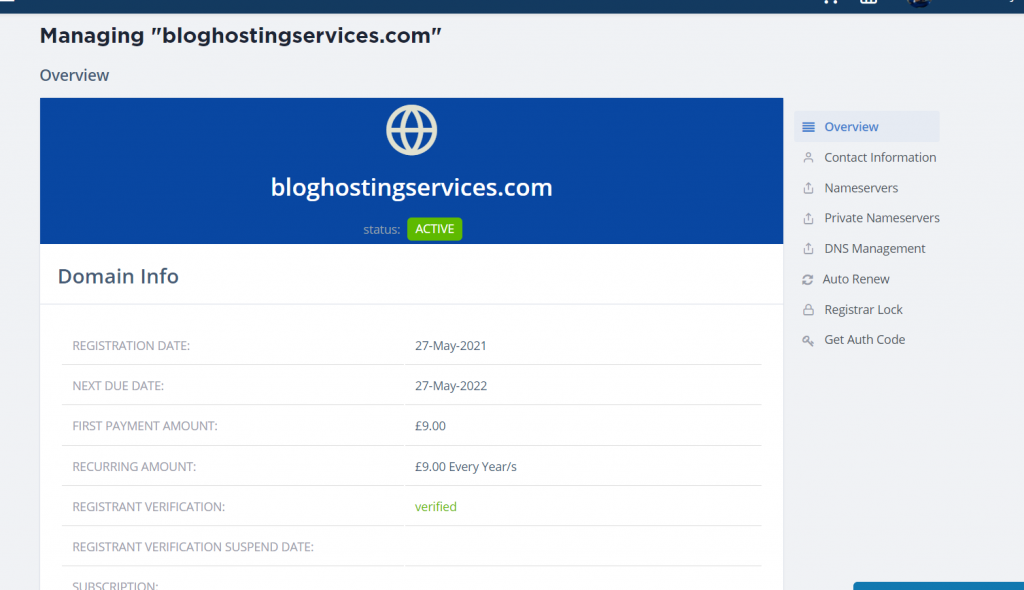
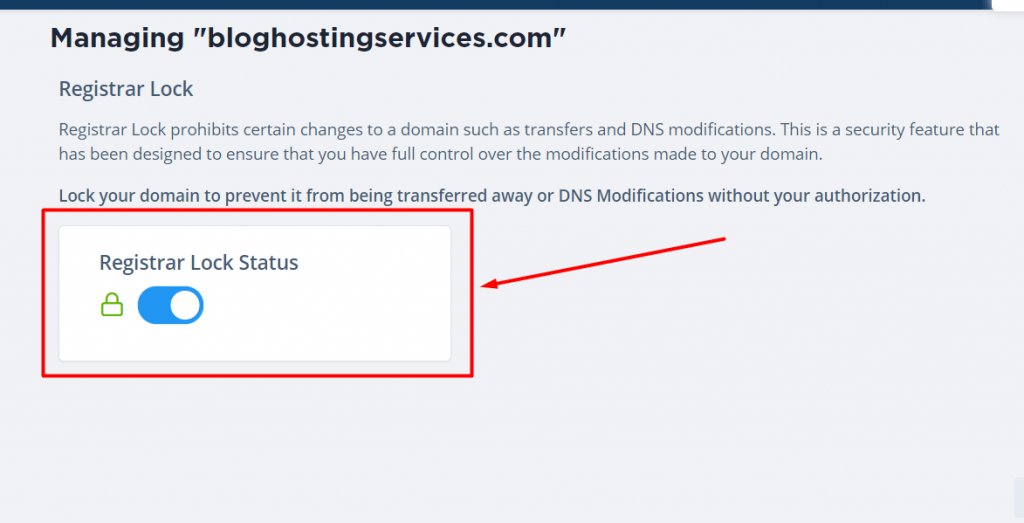
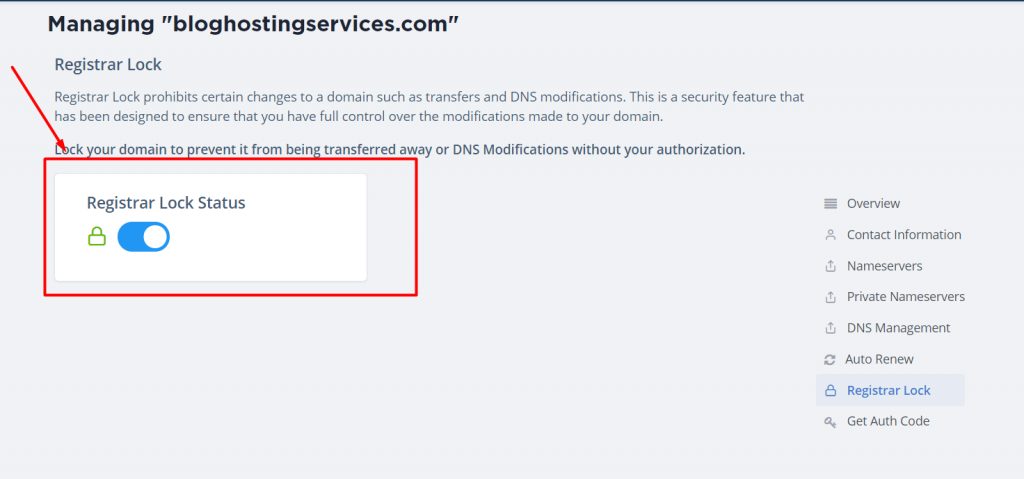
- Before you change the nameservers you will need to turn your Registrar Lock Off. To do this select the “Register Lock” option.
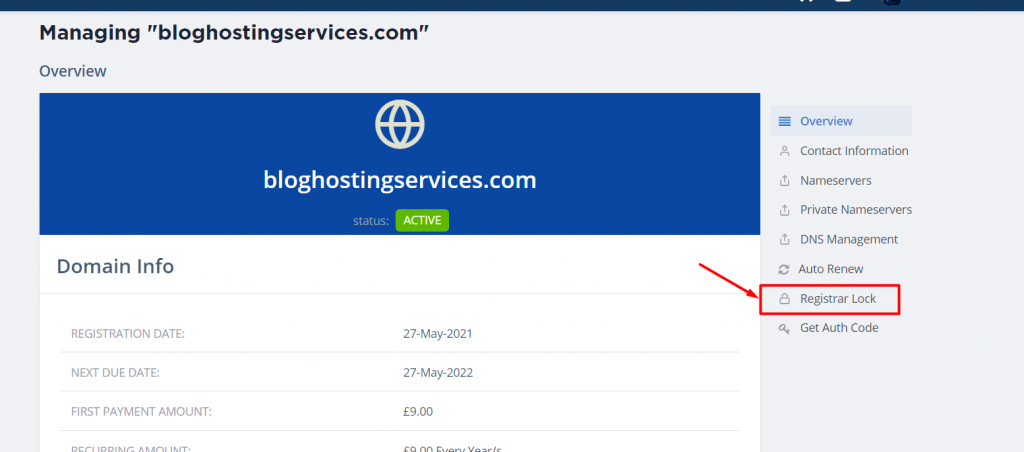
- After that, page will be navigated to the domain Registrar Lock page which looks like this.
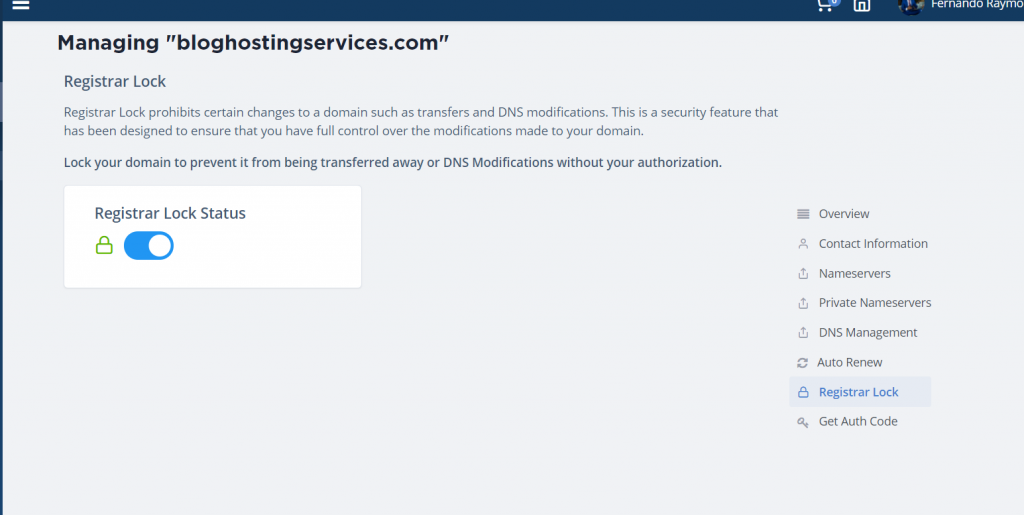
- Click the Registrar Lock Status button to turn it off in order to update the nameservers.
- To locate your nameservers go to your WordPress site info page and copy the nameservers provided for you there.

- After that click the “Nameservers” link on your Domain overview page.
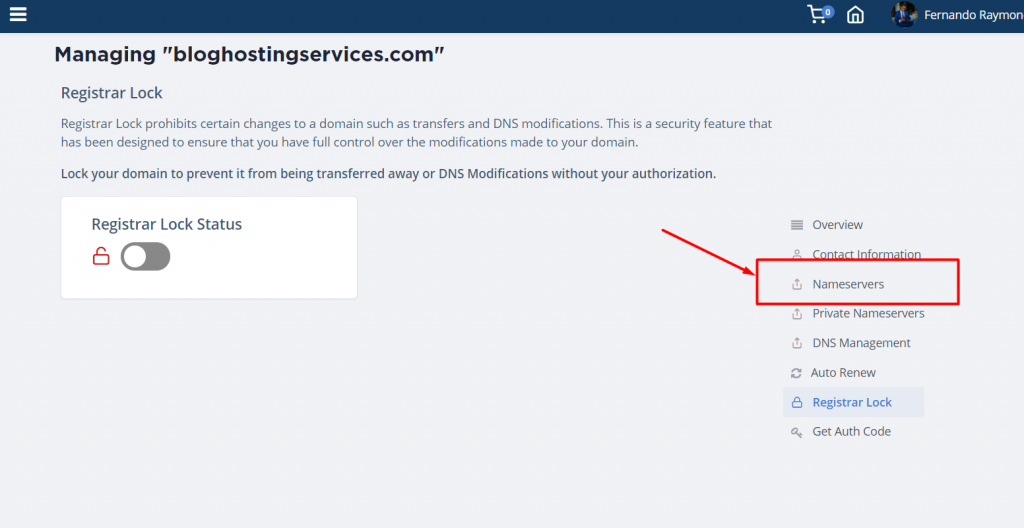
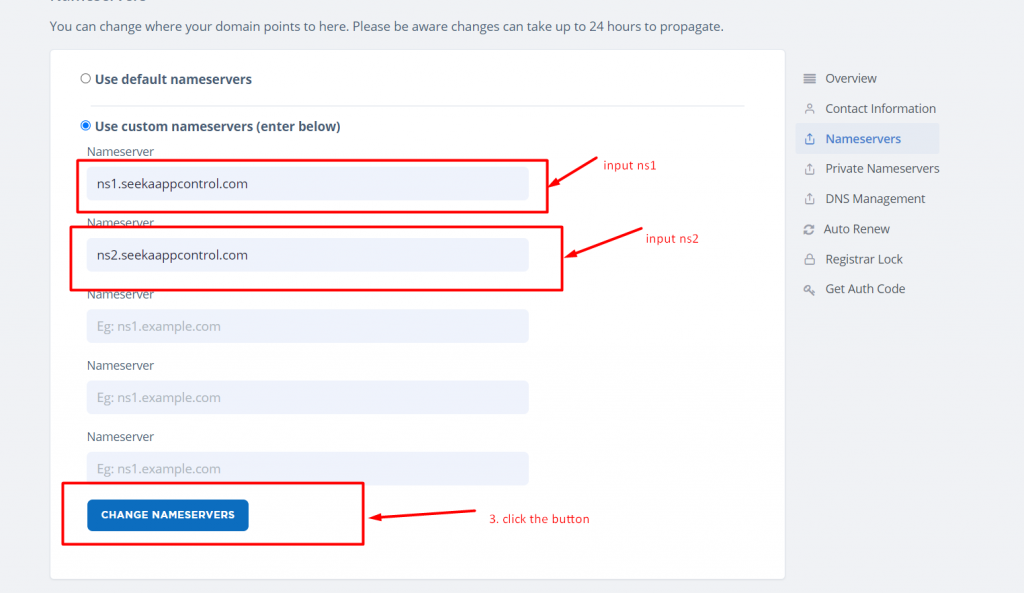
- After that, page will be navigated to the domain Nameserver page. And now select Use Custom Nameservers (enter below)
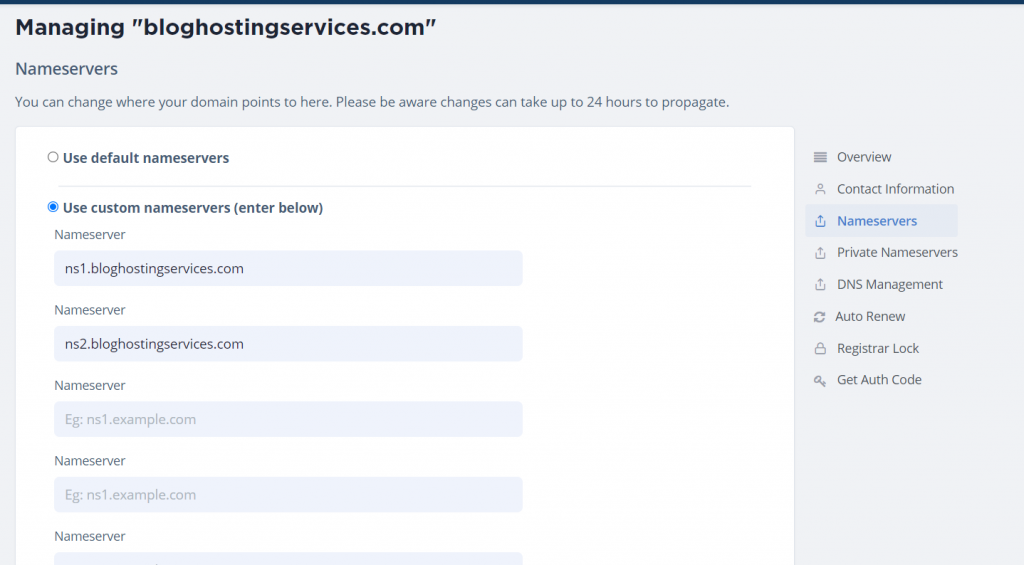
- Now you can change your new Nameserver records, below has mention your Nameserver records, copy that and past it in input fields, and click the change nameserver button.- ns1.seekaappcontrol.com
-ns2.seekaappcontrol.com
- Finally, again go to the Domain register lock page and lock it.