WordPress Tutorial for Beginners to Create a Website with WordPress

By James Flarakos | December 24, 2021
Table of Contents
Learn how to how to Create a Website with WordPress. A complete step by step WordPress tutorial for beginners.
There are many guides on the web, however, this is the most simplified step by step guide with video tutorials. So you can read and then video each video where you will get a thorough understanding of how to build your own site on the world’s best CMS (content management system).
Starting a site is the very first step to getting online and exploring ways to earn via the internet. There are millions of people who have started their own blog sites and making a living with web properties.
Once you know how WordPress works, you can jump-start creating your private blog sites that make passive incomes on autopilot.
1. Understanding What WordPress Is
So let’s get started with understanding what WordPress is before we go into how to create a WordPress website. It’s always better to have a full understanding as well as an overview of the features you get to a full understanding of all that you are able to create.
Whats Is WordPress?
WordPress is a user friendly way for people of all technical abilities to easily Create a Website with WordPress. All the coding has been taken out of the equation and the developers have created the visual editor.
The visual editor is a visual way of putting your website together with the code already set up within the “blocks” WordPress uses to add your content.
This makes creating pages and posts extremely easy as its simply a case of choosing the type of block you want to use, and then adding the content such as text, images, videos and much more.
How ever it goes even further and gives you the use of plugins. Which are downloadable programs you can download to your website to give you a huge variety of other features and ability’s for your websites. This can range from forms, forums, review pages, security and almost anything else you can imagine for your personal website.
Learning Points Through Out The Article
- How to get a good domain and hosting.
- Connecting domain to hosting.
- Setting up an email for your website.
- Creating the entire website step by step.
- Securing your personal website.
- Adding is to google search console and analytics
- Using Useful Plugins.
- Increasing Your Websites SEO.
How Domain And WordPress Hosting Works to Create a Website with WordPress
A common mistake that people make is in thinking the website domain and the website itself and the same thing. They are infact 2 different entities and can be hosted together from the same company of mixed between WordPress hosting company and domain registrars.
Meaning you can get domain from somewhere offering a great deal and add it to another hosting offering a good deal also, meaning you can can benefit for looking for cheap hosting and domain registration separately or somewhere like SeekaHost where we have both low prices and easy to connect.
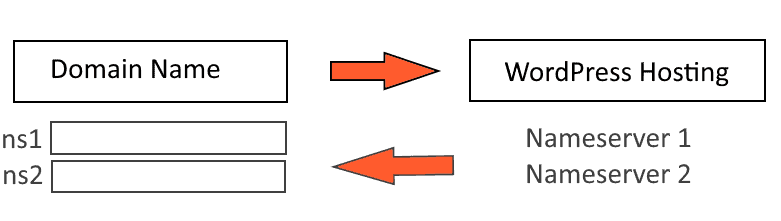
The way it works is with nameservers, once you purchase your WordPress hosting and create a website it will provide you with a set of nameservers, ns1 and ns1. This means you can simply build the website here but as of yet has no domain connected to it. So no way for anyone to search it and end up on your website.
To make the connection as the picture below you will need to give the nameservers provided to you by the WordPress hosting and insert them into the domain to make the full connection.
2. Getting Your Domain And WordPress Hosting
This part may seem simple to some but its always best top research everything there is before starting, just to avoid any early mistakes. And this is crucial as a WordPress tutorial for beginners.
Researching a Domain For Your Personal Website
Finding domain names can always seem like the easiest part with such a variety available to you. But we always suggest you research them first to make sure you avoid some easy mistakes and also make your domain relevant to your genre.
These are some of the main points to always look out for when getting a domain.
- Shorter domain names are easier to remember.
- Dont get one with symbols or many numbers.
- Stay relevant to what your website offers.
- Looking for keywords that are relevant to add in your domain.
- Try to find something memorable.
Free vs Paid Domains Pros and Cons
Free Domain Registrars
Thats right you can also find domains for free using freenom (for up to 12 months). Using this service will limit you to different domain endings such as .tk .ml and other obscure domain endings.
The pros of course are the fact that you can get them for free depending on the popularity, how ever thats where the pros stop.
Unfortunately there are a variety of cons with using free domains to create a website with WordPress. Firstly the freenom website doesnt run correctly. Sometimes working, or other times with broken link, most tutorials you will find about it are how to bug fix problems.
Even getting your domain can be tricky as it displays many free domain names but when you try to select them they simply say not available.
Further more propagating servers can be very temperamental. With nameserver taking anywhere from 1 hour to a few days from my experience, making it very frustrating when trying to connect your domain to your WordPress hosting.
Also in the small print, you will find that the domain can not only be taken from you at any point, but they can also charge whatever amount they feel necessary when the renewal comes. Meaning that if you grow your site and your domain shows as a popular one that has received a lot of traffic, they can simply ask for x3 or x4 the price they might normally ask as they know you will want to keep this. Making this quite an un stable way of having your domain, with many stress and worries. And if you want to check yourself simply take a look at the freenom trust pilot.
Paid Domain Registrars
Using reputable domain hosting companies gives you a huge amount of pros depending on who you go with.
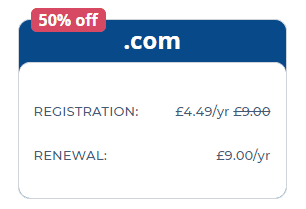
With SeekaHost you can get a domain with a popular .com ending for as little as £4.99 per year for your first year and less then £10 for recurring years after.
You get security of your domain not been taken away from you as well as renewal options to make sure you dont lose your domain after the first period you registered it for.
The recurring charge stays the same as advertised and wont go up simply because its a popular domain, quite the opposite as we love to see our customers grow and receiving more traffic to make it a popular WordPress website.
Customer support for a paid domain is of course much much better, with options of live chats, tickets and fast responding to make sure queries and problems are fixed quickly.
Registration, connecting your name servers and general domain management is made far easier due to the companies having better resources to give you better service that have been tried and tested with on going updates.
Free SSL and business emails are also things your get with SeekaHost by getting our Hosting. Meaning that by paying a small price you get more free features that ironically you would have to pay for when using a freenom domain.
Realistically when suggesting what to do when creating a WordPress website as a beginner or even a professional is always use a reputable domain registrar to get your domain. For extra security, better features and easier management.
Finding Good WordPress Hosting to Create a Website with WordPress
Bad Features To Look Out For
Pricing
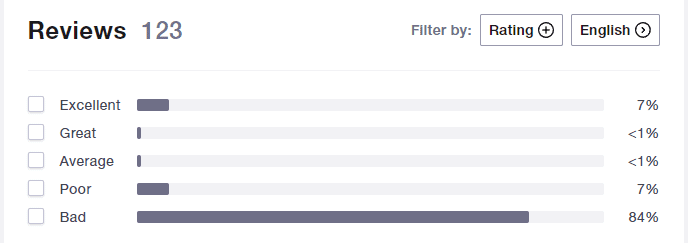
Finding good WordPress hosting is important, many companies will try to get you started with very cheap prices to start with. But these are the ones to watch out for, ones with massive discounts or scored out original prices are the worst for this. For example, some places may offer 2.99 per month hosting, down from 11.99. This might be a great price to start with but what about when the discount ends? Your price will go up x4 your normal price making it in some cases very unaffordable for a lot of us.
This way of enticing customers in with discounted prices is a well known marketing strategy but its easy to fall for when you first see the price. Always make sure to check the re occurring price otherwise you might get stuck with a very bad deal.
Features You Get
Another clever marketing strategy you will find on a lot of WordPress hosting sites are features that sound great but have no substance. Stuff like “Unlimited Websites” but with limited web space to actually hold them in.
Enhanced Security is another wording they like to use to make you feel like spending more or using them to increase security when in reality they will use much the same protocol as they dont want any of their packages to be susceptible to security attacks, as after all they are all run on their servers.
Out The Box Cashing is simply advertising something that regularly happens with any website, in fact you will usually have to download an extra plugin to simply stop cashing or delete cache on your website as it uses up extra memory.
E-commerce Enabled, this I find hard to understand as you can use plugins to create an e commerce shop with out spending a penny, so by enabling it. This surely means the company has simply disabled it to then advertise that a certain package will have this enabled. Meaning they are disabling a feature like plugins and letting you use this feature and masking it as an extra feature you get.
Good Features To Look For
- DDOSS protection.
- Domain Email.
- A good amount of web space per website.
- Use of WordPress Settings.
- Use of WordPress Plugins.
- Customer Support.
- Free SSL Certificate.
- Good Reviews.
- Generally cheap prices (not only the discounted ones)
For example a cheap WordPress hosting package with SeekaHost will cost you £1 per month, with no discount and no price rise after a certain amount of time. Using Site ground after the discount runs out, you will be paying £11.99 for exactly the same service. Meaning it pays off to shop around.
3. Setting Up Your WordPress Website
With the pre research mostly done lets start taking a looking at the management systems for your domain and hosting to make sure you have a full understanding of the features you can use.
Understanding Your Domain And WordPress Dashboard
Domain Management Dashboard
For your domain management dashboard you have a few options that are default with all domain registrars. This is a nameserver option and also a DNS option.
You nameservers are what connects your domain to your hosting and makes that essential link between someone searching your URL to then arrive at the website you built for it. What typically happens is you have two choices, either default nameservers or custom nameservers.

The differences are, if you start with SeekaHost for instance and you get your domain and WordPress hosting you can use the default nameservers as they will share the same ones for all packages. If you have hosting else where you can choose the custom option and insert whatever nameserver that have been provided by a different host.
The nameservers will give the domain the IP information, mx records and all the information it needs to make the connection.
DNS is used for settings up mailing, sub domains and a variety of other things but as a WordPress beginner you really wont need to worry about any of this.
Connecting Domain To WordPress Hosting
Hosting With The Same Domain Registrar
This is the easiest way of setting up the nameservers. For example if I get my domain with SeekaHost and also my WordPress hosting, it will automatically be set to default nameservers so will work with out having to insert the nameservers yours self. So no need to stress as your connection will be set up once you have both hosting and your domain.
Hosting With Different Hosting And Registrar
This is for example if you have a domain from GoDaddy but want to host it using SeekaHost for the cheap WordPress hosting. This is done by inserting the custom domains provided by the WordPress hosting into the sections in the domain, so lets go through how to do that.
- Start your WordPress site with your host using the domain you want to use.
- Copy the nameservers 1 and 2 provided from your WordPress site.
- Unlock your domain to make changes.
- Go to nameservers and select custom nameservers.
- Insert the ns1 and ns1 (nameservers 1 and 2) in the correct fields.
- Save the changes and re lock your domain.
This, depending on your host can be anywhere from instant to up to 48 hours to propagate. You can use leafdns with SeekaHost to check when the propagation has been made.

Once they are done you can now log on and edit your website, if your using SeekaHost then you can now also enable your Free SSL certificate for your site from your WordPress site option.
Setting Up Your Domain Email
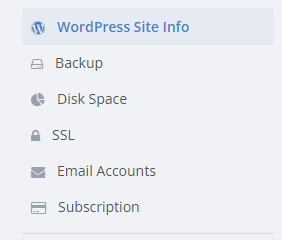
This is host specific but here with SeekaHost it has been made extremely easy. So lets get started by going to your WordPress site on SeekaHost.app and going to the specific websites info.
On the right hand side select the “email” option.
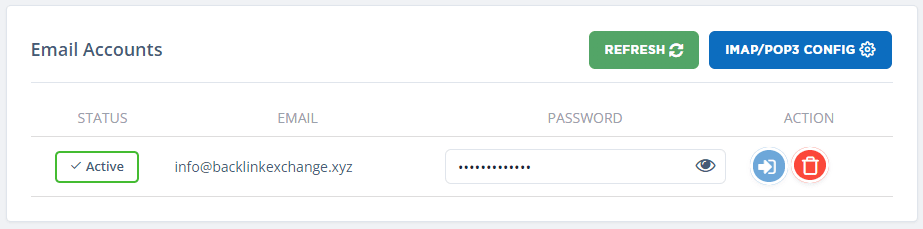
Now its simply a case of choosing a prefix for your email (the starting words) and a strong password. Then tap on create and within a minute you will have a brand new domain specific email for your WordPress website.
Now simply tap the blue button tot he right to log into your webmail accounts and manage your emails.
How To Log In To WordPress As An Admin
So once your all set up and ready, you want to start editing. So how exactly can you log in to your WordPress website as an admin?
Its much easier than you might expect, once your website is live then its simply a case of adding the admin log in at the end of your domain.
This is /wp-admin
So for example if my domain is “www.mywebiste.com”. You will need to type www.mywebiste.com/wp-admin to log in to the back end as an admin.
This will bring you up to your login screen and you can enter the information given to you when you started your WordPress site to login.
And if your thinking, well this seems insecure. Anyone can find my log in page. Then rest assured, you can use a free plugin to change this to a custom login URL. Simply download the wp-cerber plugin and change the login URL to a different option.
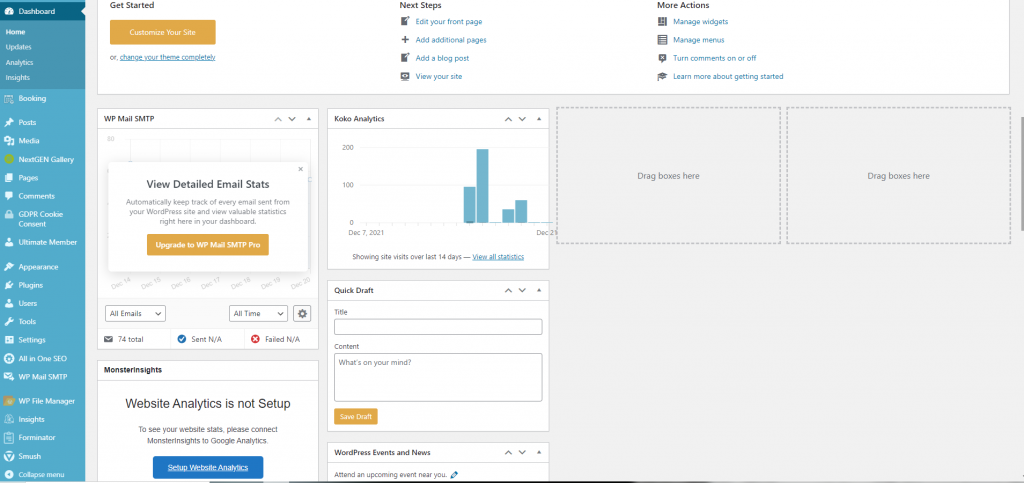
4. Understanding Your WordPress Dashboard
Before we get in to editing and creating pages/posts on your website its best to have some sort of knowledge of your option on the WordPress dashboard. Here we take a look at every option you have available.
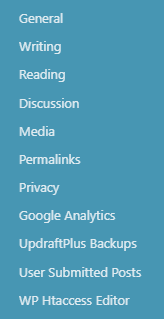
WordPress Settings and Options You Have
From your settings your can add Home or Post pages and configure how many posts can be displayed, you can setup a private email that your able to use to post straight to your blog from. Your able to configure the ratings of members avatars or what general avatar will be used if someone isnt a member and many more things that would be useful to have configured from the beginning
of building your blog.
WordPress General Settings
Here your able to change the Site Title and Tag Line that appears underneath your title on your pages. It also holds your WordPress address and also your Site address. You can use your Site address to change the page that displays as your Homepage here.
You can also change Time Zones, Default Roles, Site Language, Date/Time
Formats and Membership options on the General Settings.
WordPress Writing Settings
You can use these settings to setup a secret email address to be able to post
straight from an email to the blog. All settings related to that will be found in
this section. Such as Default Post Formats or Default Post Category. To complete this
you will need to setup an email and password.
WordPress Reading Settings
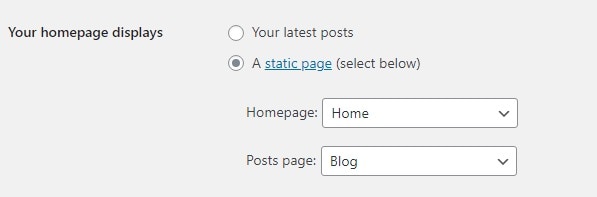
Here you can link your Homepage and Blog page or choose to show only your
posts as a home page through the Your homepage displays option.
Your able to choose if posts are displayed in full text or just a summary, and
how many posts can be shown per page.
WordPress Discussion Settings
Most of your notification and comment options are here so take some time to
read them and configure your site the way you want it to run. For example you
may want a high volume of post commenting on some sites. Where as with
some others your might want comments to be turned off entirely.
Discussion Categories
1.Default post settings
2.Other comment settings
3.Email me whenever
4.Before a comment appears
5.Comment Moderator
WordPress Media Settings
Use this page to configure the standard size used for pictures that you upload
and use.
Media Categories
- Thumbnail
- Medium
- Large
WordPress Common Settings
WordPress offers you the ability to create a custom URL structure for your
permalinks and archives. Custom URL structures can improve the aesthetics,
usability, and forward-compatibility of your links.
You can choose from:
- Plain
- Day and Name
- Month and Name
- Numeric
- Post Name
- Set up your own custom structure.
WordPress Privacy Settings
As a website owner, you may need to follow national or international privacy laws. For example, you may need to create and display a Privacy Policy. If you
already have a Privacy Policy page, please select it below. If not, please create one.
The new page will include help and suggestions for your Privacy Policy. However, it is your responsibility to use those resources correctly, to provide the information that your Privacy Policy requires, and to keep that information current and accurate.
After your Privacy Policy page is set, we suggest that you edit it. We would also suggest reviewing your Privacy Policy from time to time, especially after
installing or updating any themes or plugins.
There may be changes or new suggested information for you to consider adding to your policy
5. Free WordPress Page Builders
Page builders are important as they shape the way you can build pages. There is nothing wrong with using the default page builder and in fact many people including myself prefer it in some situations. But lets go through some other free alternatives which also give you some cool different options you can use.
Just be aware that some page builders arent compatible with each other on the same pages. Meaning that if you start a page on one, then switch to another you might find the page/post doesnt transfer over too well. So we suggest you play around and the start and choose one that you feel comfortable with. Alternatively start with the default visual editor and then if you choose to switch to another page builder it will have the highest likelihood of transferring over to another page builder correctly.
Using The Default Page Editor to Create a Website with WordPress
Your default page builder is what everyone will start with on WordPress. Although you might think that default isnt always the best. Its the most tried and tested method you get with a huge amount of features and diversity in what it can do.
You build in blocks going from the top of the page down. Each block goes under one another and you can easily move the blocks up and down once they have been created.
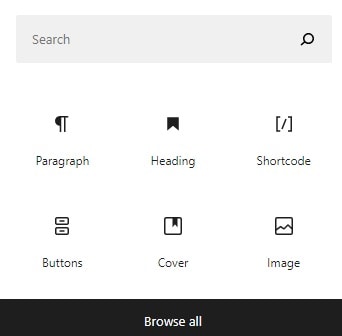
You can add headings, images, videos, embed and almost anything else you could imagine to the page. Then simply fill out the content within each block to start completing you page/post.
You can also choose columns and have multiple blocks within the section your working on.
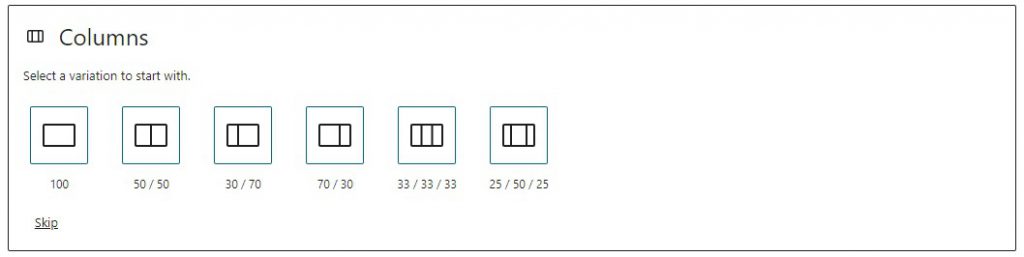
The default visual editor is one of the easiest page building methods to understand a great way to get started creating your WordPress website as a beginner.
Elementor Page Builder
Elementor is a very popular page builder used by many designers. This is due to its flexibility and ability to create something very customised for websites. You get more column options and much more in terms of customizing each block further after displaying it.
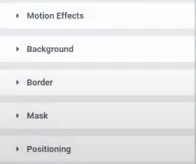
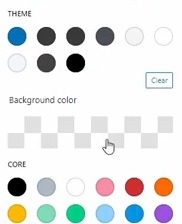
Each box or section you put down will have further customising options such as borders, different borders when you hover over them. Animations or display options. More sizing, different colour choices and much more.
You also have some other free add on plugins to increase the block choices you get with elementor.
Gutenberg Page Builder
A page builder much like visual editor, Gutenberg has similar options with a bit more configurability. It also hook in really well to the default Astra them you start with on WordPress.
Another plus for this page builder is that it has been around for some time and most other plugins and themes will work well with it. Along with that it also has many free add on’s you can find in the plugin section to add more functionality to Gutenberg page editor.
Beaver Page Builder
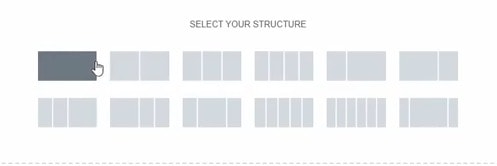
Beaver page builder is another great free resource you can use to build pages and have different customisation options. This one is closer to Elementor in the way you can choose column options and how you an customise each block.

You can select the rows and columns and simply drag and drop the style of block you want in each one. Whether it be images, texts carrousels or anything else it offers. You also get extra customisation options of each block which makes this similar to Elementor in ways.
6. Create a Website with WordPress
So in this section we go through every aspect you might need to learn about creating a WordPress website. Work your way through each section and you will be fully versed in all aspects of WordPress editing.
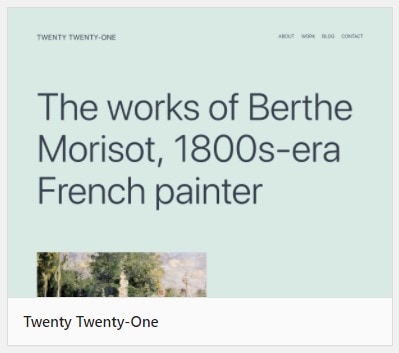
Choosing A Theme For Your Personal Website
A theme can change the entire look of your website, and provide you with areas to use different features you might want. I always suggest taking some time and finding one specific for your website relevance as not all theme page setups are the same. Meaning that if you switch after creating much of your website you might find parts simply wont appear on the new theme as its set up differently.
To choose a theme follow these steps:
- Log in to the back end of your website.
- Hover over the Appearance tab on the left hand menu and click on Themes.
- Select Add New and search through the themes.
- Preview the theme and once happy click on Install.
How To Create A Homepage With WordPress
Creating a homepage on WordPress is a good starting point for your Website. You can specify a page to be your front page where all home buttons, images or links will take you to. You can also choose to have your blog page as your blog page, meaning it will simply show your latest blog posts on the home page rather than a static page.
How to Choose Your Homepage
- Log in to the back end of your website.
- Hover over the Settings option from the menu on your left, then select Reading.
- Now you can choose whether you want a static page or your latest posts.
- If you have a certain page for your home page, pick Static Page and select the page you created for it with the drop down menu.
- If you want you homepage to display you blog posts, then select Your Latest Posts.
- Now tap on Save at the bottom of the page.
How To Create A Blog Page With WordPress
Creating a blog page for your WordPress website is very similar to creating a homepage, but it serves a different purpose. By selecting a page as your posts page, it then means every blog post you create from now on will automatically display on the posts page. This is similar to a social feed on Facebook where your latest posts will go ontop of the previous one in a time line.
You dont need to create anything on this page as its primarily for the posts to get posted on. You can how ever change the widget area to give some extra options or navigation on the page.
How To Pick a Blog Page:
- Log in to the back end of your website.
- Hover over the Settings option from the menu on your left, then select Reading.
- Click on the drop down menu next to Post page and select the page you wish your posts to be added too once published.
- Now tap on Save at the bottom of the page.
Creating Pages For Your Website
With your Homepage and Posts Page now selected lets find out more about creating pages. How to add, remove and edit pages on WordPress. Pages are more permanent fixtures to your website as all websites are built with pages. You can use pages to create navigation menus on your website and can have a variety of different features on each page.
a) Adding A New Page On WordPress
- Select Pages option from the menu on the left of WordPress.
- Click on Add New to start a new blank page.
b) Removing A Page On WordPress
- Select Pages option from the menu on the left of WordPress.
- Under the page you want to remove, click on trash.
- Alternatively for multiple pages, highlight the pages you want to remove.
- Using the bar above the pages, select bulk actions and change it to move to trash, then tap apply on the right if this drop down menu.

How To Edit Pages On WordPress
Editing pages on WordPress to create your website has really been made easy for anyone of any level. Using whatever your chosen page builder is, you are able to start putting together a great looking page, whether its your homepage, an informational page or even an e commerce shop to sell your products.
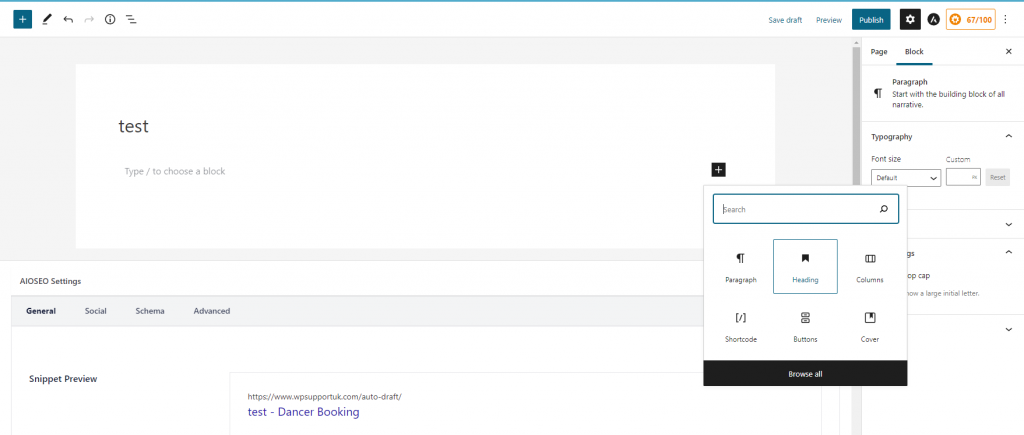
Create your new page using the step above and you can start building it using the blocks provided.
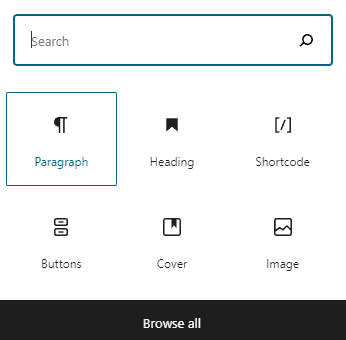
As you work your way downward its important to remember what way to way out your page.
- Heading
- Paragraph
- Image
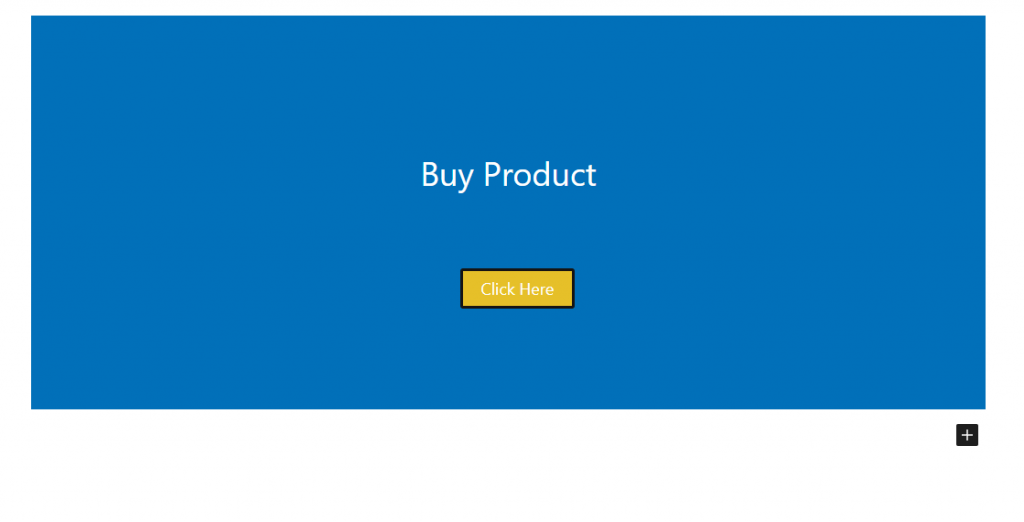
And use any of the other features to really make your page stand out in between. By using buttons or cover photos you can make some really user friendly links to other pages or posts and display your products or information nicely for others to find.
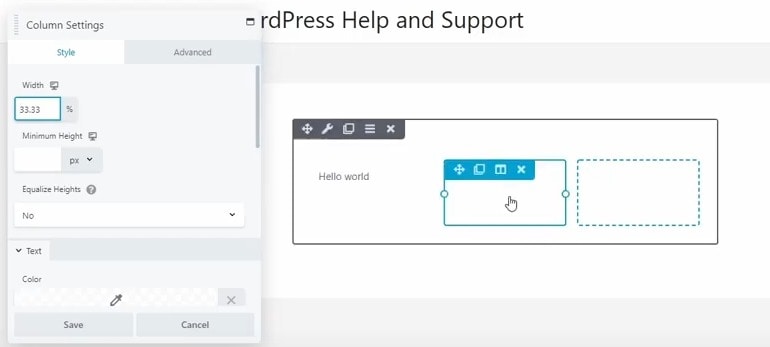
On the right hand side you will also find other options for the page or the block it self. By clicking on a block it will show you your available settings for the block.
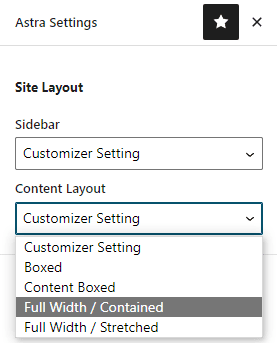
Alternatively if you click off from the block and onto the page you will get the general page settings, if you have AIOSEO or the Astra theme installed you will also get extra options such as page width, whether its boxed or stretched and some other options too.
Creating A Menu For Navigation
A websites menu is going to be your greatest navigational tool. This is how you can create your main website menu that guides you around the website easily with links or how to make any smaller sub menus that you might find in your footer or widget area.
![]()
The best way to create your menu is by going to customise. Appearance > Customise > Menus as you will also get a live preview of what it looks like as you put it together.
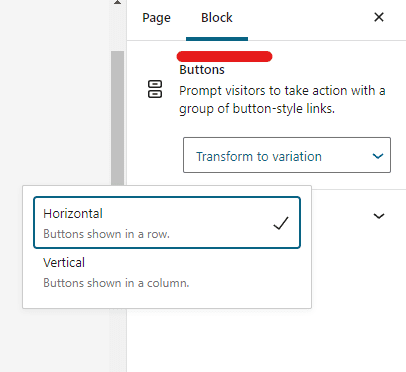
First lets create a menu and set it as your primary menu so it shows up at the top of the page, you can create different menus for different areas. Now you can start to use pages, posts, categories or other created content to show as your menu. You do this by first adding the options you want on your menu.
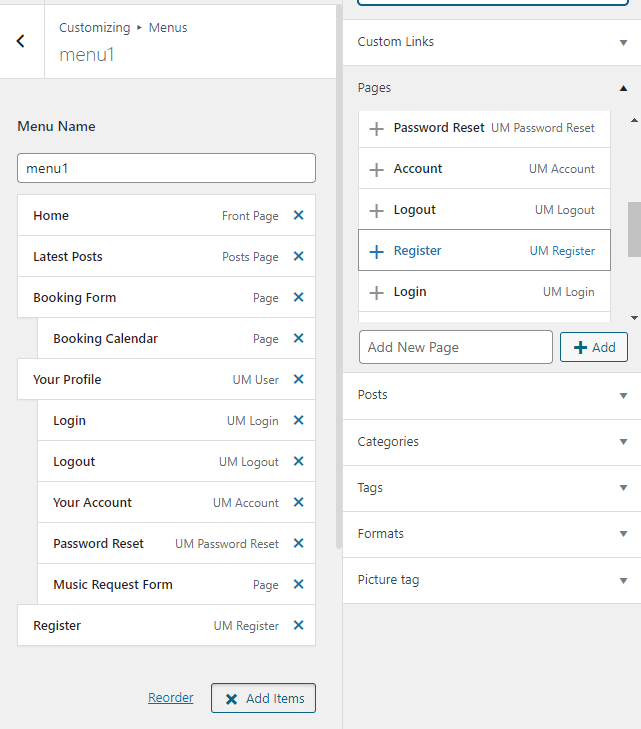
To organise your menu you simply drag the menu options under another. To make one a sub menu, meaning you need to hover over the main option to display sub options you need to drag it to the right a bit of the parent option. As you can see the booking form option in the picture above, the booking calendar is a sub option of that and will only show if i hover over the booking form.
-Main Option
-Sub Option
-Main Option
-Sub Option
How To Create Post Categories
This is the best way of displaying all your categories easily and making finding different posts you have made much easier for visitors. You can categories all your posts for your website by creating parent and child categories depending on how you want them displayed.
Firstly to start creating categories, go to Posts > Categories.

You can now start to crate categories, either as a parent category (main) or a child category (sub category of the main one). Simply name it, add the URL slug and then add a description if necessary.
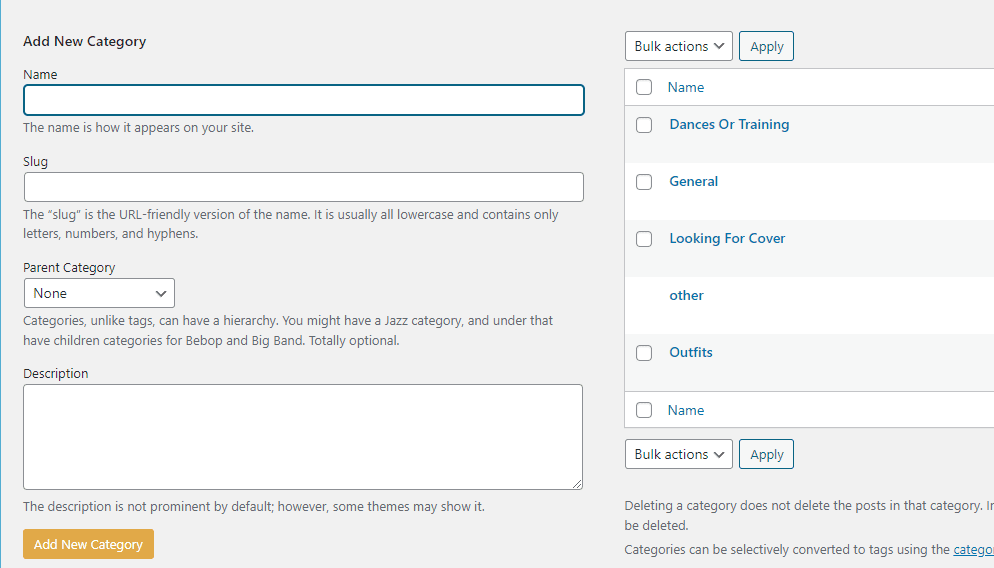
To create a parent category for the one you are currently creating, select the parent category from the drop down option available. You will then see it appears as a sub category of the parent once you added it to your list.
Configuring Your WordPress Website
Getting your settings right on WordPress is important. We go through all the settings you get as default and explain all the options and configure our website so it displays well and also keeps us safe.
Make sure to follow the video through as there are many smaller things you wouldnt have thought to change that will actually vastly improve your WordPress site and how to displays online.
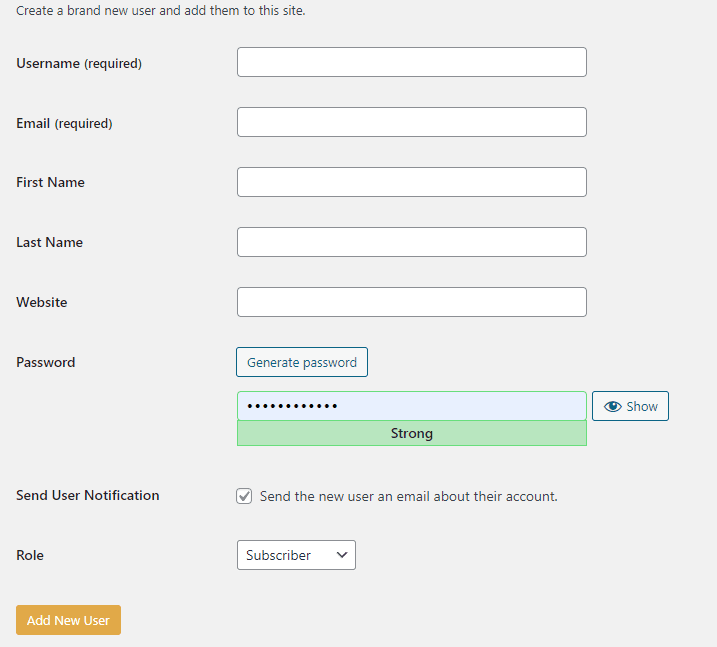
How To Create/Edit/Remove Users
Users can be added with a number of different roles. So you can add other administrators, editors or subscribers to your website. Each comes with different roles and are able to do different things on your website.
Administrators can do everything as you can on your website and you should be careful who you give this role too. As they can remove or add anything to your website.
Editors have some more permissions and they can create and edit posts that go live on your blog page, great for anyone with multiple authors for their website.
Subscribers have the least permissions and this is usually if you have a forum or membership where they can log in and access the front page but not the back end of your website. This is also great for subscribers for posts or RSS feeds you have for your website.
By going to Users > Add New you can add in their email, create a password and send them the information to log in as whatever role you have given them.
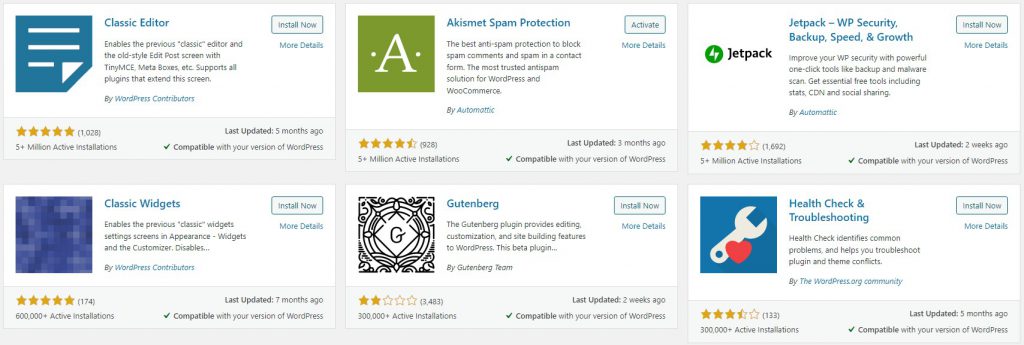
How To Use Plugins On WordPress
a) How To Add Plugins
Go to Plugins from your main dashboard and then Add New.
From there search for your desired plugin and after previewing it, click on install followed by activate. This will then return you to the screen with all your plugins on WordPress.
b) Accessing the Plugin Settings
Go to Plugins from your main dashboard.
You will see a full list of any plugins you currently have installed, right underneath the plugin name you will find a settings option. Alternatively some plugins will also appear on the left or top menu of your WordPress (back end of the site) for easier access.
c) How To Remove Plugins
Go to Plugins from your main dashboard.
You can individually remove them by selecting de activate under the plugin and then delete. To remove multiple plugins, select all the ones to remove from the left and use the bulk action option to deactivate ad then delete by clicking apply.
Customizing After You Create a Website with WordPress
The customise option is another way to edit the site but more its appearance, front end of the site and how it displays the content you have created from the back end.
By going to Appearance > Customise you get a live preview of the changes you make to your website as you change it. From here you can create and sort your menus, headers, footer and widgets along with other variations to change depending on what theme you choose.
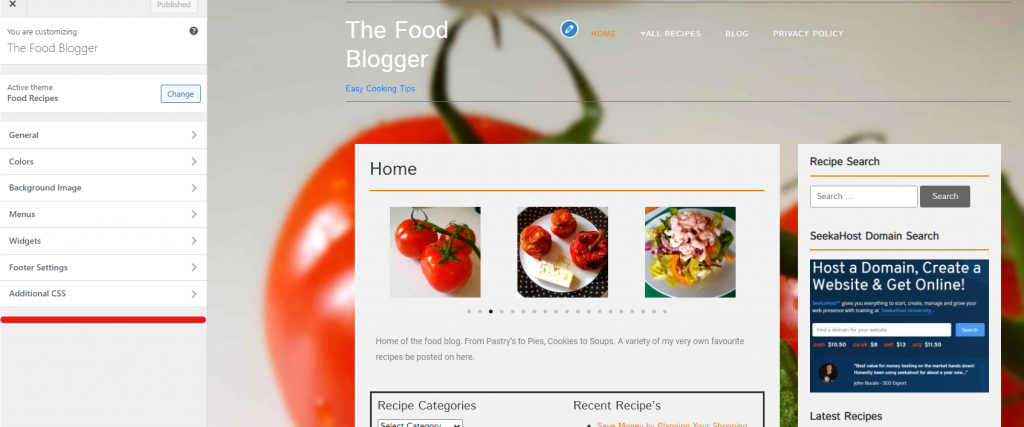
We suggest you go through all your customization options on the left hand side and really tailor it to suit your site and make it stand out from others in the same genre.
Create custom headers, footers, colours and other options like widgets which we look more at in the next section.
Adding Widgets On WordPress
Widgets can really help for many reasons. You can add almost every block from the page builders as well as other features from widgets and create really effective side bars and other sections to help navigate, or make your website more user friendly by displaying other information, pages or products along the side of the main screen.
Popular Plugins To Use When You First Start
Widgets help every one to navigate seamlessly through your blog/site and have a good experience. Leading them to spend more time on your site and potentially return back to check content more regularly. You can add anything from social links, meta logins, Discord and YouTube content, embed videos and much much more. You can also add separate menus and widgets to display your latest blog posts.
To get started, heads to your WordPress dashboard. You can either go to Appearance on the left hand side of the dashboard and then using the drop
down menu select Customize. Or when on your site tap the Customize button on the top left of your page next to a paintbrush.
Now from here navigate down to Widgets.
Once you select widgets you can choose what part of the page you want to add the widget too. Themed pages will usually have a structure setup for you to
add widgets onto the page in certain locations. For example in the picture above the theme only supports widgets on the Default Sidebar.
Now all you need to do is the select the widget you want to add, you have any options such as search, meta, social media icons, links, latest posts, custom
html and much more. Once selected simply give it a title and depending on the widget just make sure to complete any information it needs and your done.
To remove a widget you can select remove, situated next to the done button. Alternatively you can press the highlighted button on the widget if you are in
customization view on your page. And this will bring you up to the option for that specific widget
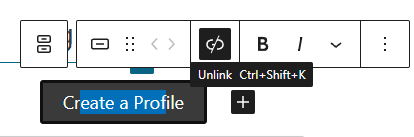
How To Link Using Text Or Images on WordPress
Looking to link a word to another blog on your page or potentially to an external link?
Highlight the word you want to link and then head to the Link Symbol (-) When you click on it you will be provided with a box to type or paste the URL of where you want the link to head to.
Other choices you may want to add are title or link texts, this will come up with a helpful messages when viewers hover over the word that you have linked and show them the title you have written.
You can also chose whether to open the link up in a New Tab or have it set as a No Follow, Sponsored or UGC link
a) How To Add a Link In WordPress – Buttons –
To add a button with a link simply add a new block to your page/post and select the button. Same as with linking words you click the Link Symbol (-) Now just type the URL into the box provided and select whether you want it to be opened in a new window, add a no-follow link, add a sponsored link or add a UGC link. Add a Title if you want it to display another title when you hover over the box and then press the enter arrow.
b) How To Add a Link In WordPress – Images –
To add an image with a link simply add an image or select one already on your page/post and select button the Link Symbol (-)
Now just type the URL into the box provided and select whether you want it to be opened in a new window, add a no-follow link, add a sponsored link or add
a UGC link. Add a Title if you want it to display another title when you hover over the box and then press the enter arrow.
How To Embed Content On Pages Or Posts
a) Benefits in Embedding Your Videos
You can advertise your video content on your blog and site pages and reach a larger audience. As your blog/site grows more people will see your videos and
head to your channel. This benefits both the page as you have engaging content, but will also help in terms of promoting your channel that you produce videos for.
You can also like this post, create tutorials with a video that viewers can follow without having to leave the site. To embed a video you can do it in two ways, either via the URL or through Text code. They are both easy methods of doing it and adding it through text code won’t require any coding from yourself. Simply copy and paste the action.
b) Embedding Through the URL
Go to your page or post and add a new block to the section you want to add
the embedded video in. Now search for the Embed option. It will now ask you for
the URL link from YouTube. This is the site address on the top of your search
engine, or if you are on mobile it’s the shareable link of the address for the video.
Now copy and paste the link for the video you want to embed and the video will
start loading up once you have completed this action. You can align it on the
page like any other media image.
c) Embedding Through Text
If you find your using a different version of WordPress then you might not have the same block format to add embeds. However, you can solve this easily by switching your page from Visual to Text from the top right corner of your page/blog screen.
First, you will need the embed code so head over to your video (for this example we use YouTube) and click the share button. Now select the option embed and copy the code. Now go back to your post/page and select the Text option. This will bring you up to the codding for your page.
All you have to do now is start on a line underneath any existing coding and paste the embedded code from YouTube. If you click back on Visual you will see it’s now been added and you can align it
the same as other media files.
d) Other Embeds on WordPress
Did you know you can also embed live feeds from Facebook, YouTube, Minigames and Discord? Many sights will allow you to embed material from their page to promote themselves. And this gives everyone a great opportunity to add more engaging content on their site/blog as well
7. Optimising Your Personal Website
Optimising your website can help for a variety of reasons but most of all it helps speed up page loading, image loading and generally gives the visitors a much better experience rather than frustratingly waiting for pages to load which will not only affect your SEO but generally annoy your visitors.
Optimising Files With Plugins
How to optimise your website using plugins. By using a suggested plugin or others that do the same job you can automatically optimise any image you upload or any previous images also. As well as that you can change the way pages load up to visitors to make the page load quicker whilst they read it rather than trying to reload the entire page all at once. We also see how using fewer plugins will greatly affect optimization.
General Website Optimisation
Make sure you keep your site optimized by not making some regular mistakes that others make by customizing certain aspects. Although visually they may look great. They are not optimized to be suggested by search engines and might hold you back from growing to your full potential.
8. Increasing Your Websites SEO
Search Engine Optimisation is an important part of any website. By optimising it for search engines you are far more likely to get shown as a result and rank higher in the result rankings. There are many off and on-page SEO you can do so let’s take a look at ways for you to do this on your site.
Posting Regularly To Grow Your Traffic
There are many ways to grow your website and posting regularly is certainly a large part of it. The more content you have, the more chance you have of being suggested as an answer on search engines. Especially if the content is good and has proven to be helpful to others previously.
Posts regularly, use keywords and other techniques we will go through in the next section.
Plugins to Help Increase Your On-Page SEO
Using one of the most well-known SEO plugins we take a look at how to install and use it to help boost our post/articles SEO and help it rank netter with search engines.
Why It’s Important to Increase Your SEO Score? Search engine optimization (SEO) is the process of improving the quality and quantity of website traffic to a website or a web page from search engines. It targeted organic (non paid) traffic and the better you improve your site/blog the more likely you are to be suggested by the search engines. This leads to more traffic to your site, which eventually leads to more exposure, sales or whatever your niche is.
Suggested Plugins to Help Increase Your SEO Score
We suggest using the All In One SEO plugin due to its ease of use and effectiveness. From Page analysis to key phrase scoring and the ability to connect it to SEMrush.
a) Increasing SEO Score
Adding Pictures with links, alt descriptions with your key phrases and related images will also help boost your score for Search Engine Optimization. Also, keep them related to the post and much like the headings more of an added guide to your blog. Embedding Videos will also help increase your score and also promote any videos you have created. Most platforms enable you to embed videos, even live streams for gamers. Search engines like to suggest long articles and ones with engaging content such as images and videos.
9. Creating Engaging Posts On WordPress
How To Plan And Create An Engaging Post
Creating engaging posts consists of many different elements. We go through the research before making the post to make sure there is an audience for it. After we take a look at keywords to make sure we’re targeting the right people with the right phrases they are using to search for this subject. We also take a look at how to add keywords throughout your article to rank better with search engines and any other aspect of getting the post that will rank well in your particular area.
a) Key Word/Phrase Research
Before getting started it’s important to have done some research into what keywords or phrases you will be using in your post. It’s best to have a list of keywords ready to use throughout your article including the main key phrase as this will run throughout the title, headings and the article.
b) What Is a Key Phrase?
A key phrase means a set of separate words that build a phrase (so it’s a multi-word search term). If it is essential to distinguish between a single word and a phrase, these terms are used in their initial strict meaning. Otherwise, many search marketers often use both terms as synonyms and prefer the term “keywords” since it is shorter.
c) How to use Key Phrases to Create Engaging Blog Posts
You need to include it in the title of your post, and also in the introduction. Other places to include your key phrase are:
- The alt of your images
- Throughout your content
- Meta description
- Featured images
- Headings and Subheadings
- URL Slug
d) Headings and Sub-headings
Make sure to separate all the different parts of your post with headings and subheadings to make your article easier to read. It helps viewers navigate and find the answer they are looking for quicker. It also makes it more readable for search engines which are likely to make them want to suggest your article more when someone searches for it. Make sure you have your key phrases running throughout the headings and subheadings. Still keeping it readable and rather serving more as a guide to your post.
e) Title and Meta Description
First of all, you need to include the main key phrase you are aiming for in both. This will make it very clear exactly what you are writing about. Furthermore it will also let the search engines know that if someone is searching for this subject, you have an article suited for them. In addition to this keep your title to the point and your meta description to around 2 sentences. You need to describe very quickly and precisely the subject of your article in the meta description. Using the AIOSEO you can see a snippet of what your site and description will look at, go toward the bottom of the page.
f) Internal And External Links
External Links are to other sites that you have linked or suggested in your article, for example, I may write an article on a Waterfall in Bulgaria with a good café to visit. To add to this article we can also leave a link within our content to that cafes website. However, don’t over link content but it always helps to have related content linked via images or words that viewers can click on to access the sites.
Internal Links are links to more content within your site. Perhaps to another blog or page, this will help drive traffic around your site. This will help for retention and time spent on your site.
Link related and appropriate words or images, for example after talking about adding internal and external links in the paragraphs above.
10. Analytics And Indexing Your Website
Learn how to index your website, get analytics for it and understand your analytics.
Add Your Website To Google Search Console
Indexing your website is important if you want to be shown by the largest search engine (google). Make sure to add your website early and get suggested much more frequently for search queries by simply adding your website to the google search console.
Connect Your Website To Google Analytics
Analytics is very important and google analytics will provide you with some great data about visitors to your site to help you improve further. So let’s find out how to add your website to google analytics in this video.
Other Free Analytic Plugins For When You Create a Website with WordPress
There is a variety of analytic plugins you can use for free. Make sure to take advantage of this and also we go through how to understand the data they are providing to make informed decisions about what content is working for you or needs improvement.
a) Installing Matomo Analytics
1. From your WordPress Dashboard go to plugins and then add new.
2. Use the search bar and search for Matomo Analytics.
3. Click Install, and after a few seconds click activate.
4. Configure Settings
b) Features Included in Matomo Analytics
Open-source
Minimise risk with a secure, transparent platform that’s been thoroughly tested by hundreds of contributors.
Accurate data
No data sampling means you can make impactful decisions based on 100% accurate reporting.
Import GA data
No need to sacrifice your historical Google Analytics data as you can import your GA data directly into your Matomo.
No data limitations
Get an unlimited number of websites, users and segments. There’s also no limitation on how much data you store.
Enhanced insights
The comprehensive range of features gives you actionable insights and a complete picture of your customers.
Easy to use
Easily navigate through a user-friendly interface to get the data you need, faster.
11. Securing Your WordPress Website
Learn how to secure your website easily and for free.
How To Keep Your Website with WordPress Safe
WordPress security is a very important part of your website. Make sure to keep fully secure by following this next section and stop admin login attempts, rate limit bots and stop malicious files being uploaded to your website.
We talk about security you can use and all the free methods you can use to help secure your website further in this video.
Step 1 SSL Certificate
Having a valid SSL certificate on your site protects you a huge amount. It makes sure that data passed between two servers or web browsers stays secure by using an encryption link.
Step 2 User Name
Don’t set up and leave your user name as Admin. Many people make this mistake and it makes it much less work for someone to hack into your account. Using a hard to guess user name with letters and numbers will make it much harder for an attacker to gain access. If your user name is admin and they guess it then they have got halfway to gaining entry to your account already.
Step 3 Keeping Up To Date
Keep your WordPress site up to date. You can check this by clicking the updates option on the left-hand side of your dashboard. Not only this but keep your Plugins and Themes up to date or delete them if you arent using them. The reason for this is due to security breaches on plugins, WordPress etc and they will release updates to fix the breaches. So by staying up to date you are making sure to have the most current safety features installed on your site and plugins.
Step 4 Download From Known Sources
Do not download from shady sites, from plugins to themes many sites offer free services. However, what you don’t see is the potential virus threat in downloading and running these on your pc or site. The WordPress site has many free themes and most of the best plugins are already free to use. Don’t be tempted with sites claiming to offer premium plugins for free also. Stealing your data can be worth a lot to these people so they will try to gain access to your files in many different ways.
Step 5 Using Strong Passwords
As I’m sure you are aware, creating a strong password will keep a majority of attackers unable to access your site. Although you may think that your normal password with a few symbols might be ok. I cant assure you that a program running thousands of passwords through your site every 5 minutes will inevitably guess that. Compared to a password like 3h4j3j6873hdh!!dkm
% where even with a program running hundreds or thousands of variations would struggle to find. Save this somewhere either by writing it down or potentially storing it on another device that’s not connected to the same network. Preferably a USB stick that you don’t keep connected to your main PC.
12. Other Free And Recommended Plugins
Our List Of Free Recommended Plugins
In this section ill go through my best used and free plugins you can use for a variety of reasons, from forums to e-commerce shops and product variations, these are my top plugins to suggest when building your website.

I hope this guide gave you all the tips on how to use WordPress and the tutorials to create a WordPress website with a blog.
Once you get your site up, it’s time to start publishing content that is useful for online readers. With the SEO strategies, I explained you can move your web pages and blog posts to top spots on search engines like Google, Yahoo and Bing. So you get traffic that you can modernise and earn money from your blogging.
You can read the guide on how to make money blogging for beginners and learn how to earn online.