How to Point Your Domain From Ionos To SeekaHost.App WordPress Hosting

By James Flarakos | April 26, 2024
Table of Content
In this guide, we look at how to connect your domain from Ionos to SeekaHost WordPress hosting sites.
We also have a guide on how to migrate your site from another hosting such as Ionos to SeekaHost WordPress hosting.
Step 1: Creating A Site On WordPress
First step is to create your WordPress site on SeekaHost.App to be able to connect your domain too. You can skip this step and go straight to “Locate Your Domain Management Area” on the next step if you have already created your WordPress site.
- Sign into SeekaHost.App.
- Click on WordPress Sites from the dashboard.
- Click on “Create WordPress Site” on the top right of the page.
- Add in your domain name from Ionos, for example > mydomain.com.
- Add in a blog title
- Select the hosting package to add your site too.
- Click on “Add WordPress Site”.
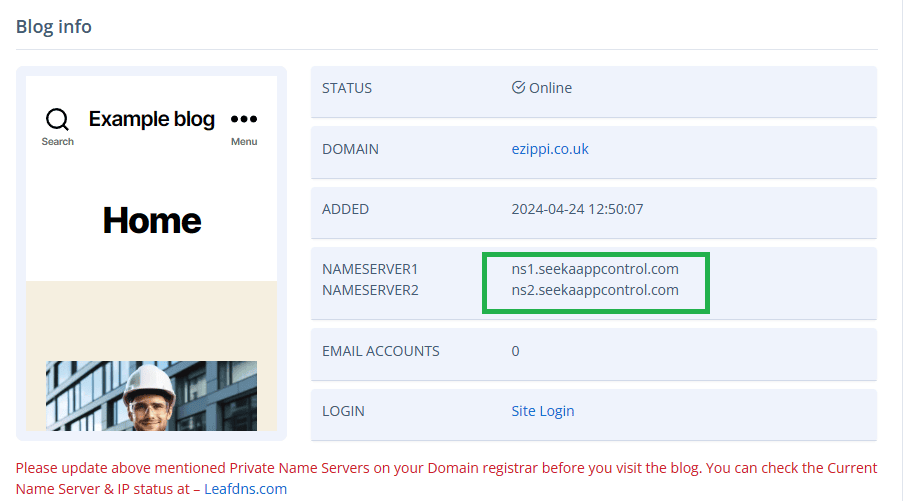
- This will load for a few minutes and then show as online. Once it shows as online, click on the Blue Cog button and here you will find your nameserver 1 & 2. Take note of these.
Step 2: Locate Your Domain Management Area
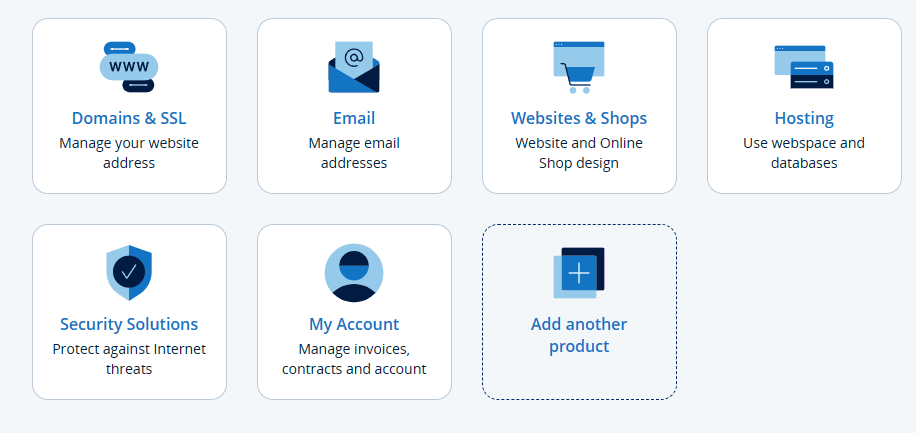
Once logged in, select the “Domains & SSL” Option on the dashboard.
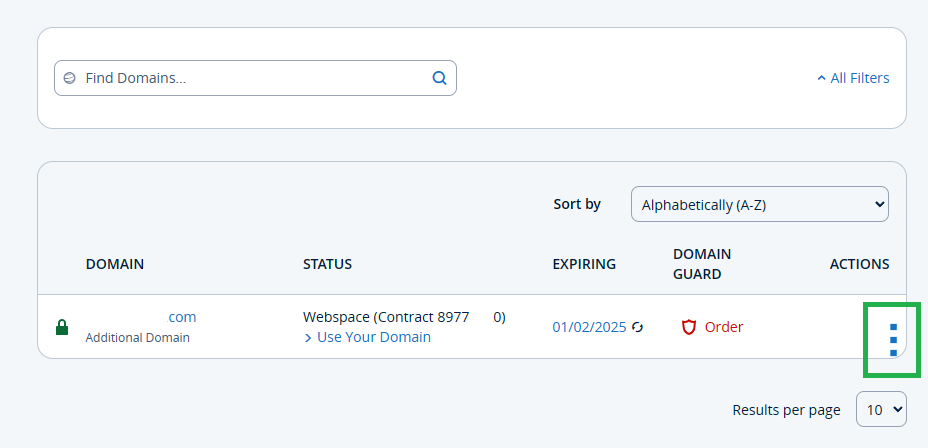
Step 3: Managing Your Domain
Find the domain you want to point to SeekaHost WordPress hosting and select the three dots under action to manage the domain.
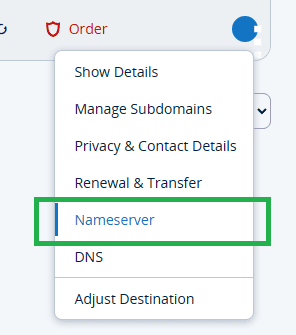
Step 4: Selecting The Nameserver Option
From the menu you get when you click on the three “Action” dots. Select “Nameservers” to manage your nameservers.
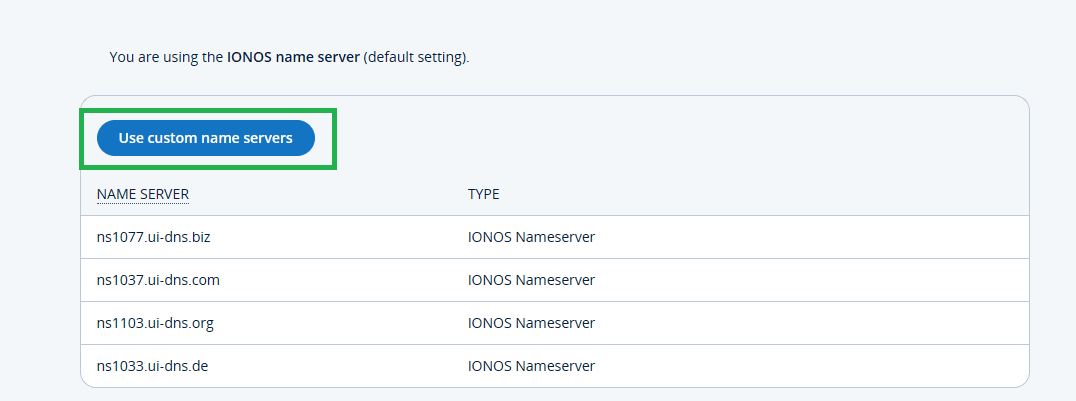
Step 5: Selecting The Type Of Nameservers
Now you will need to select custom nameservers to add the ones provided by SeekaHost for your site. This will enable the connection between your domain and website.
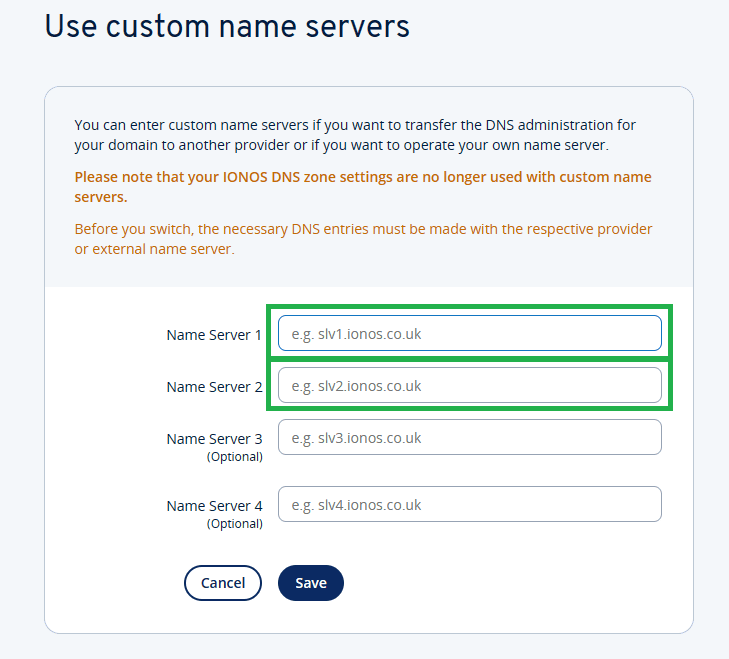
Step 6: Entering Your Nameservers
Here, you just need to add your nameserver 1 and 2 in the correct sections. In the top line, add in your nameserver 1 (This should look something like ns1.seekaappcontrol.com). Then in your second line down, add in the second nameserver (this should look something like ns2.seekaappcontrol.com). Then click on save.
Step 7: How to Check Connection
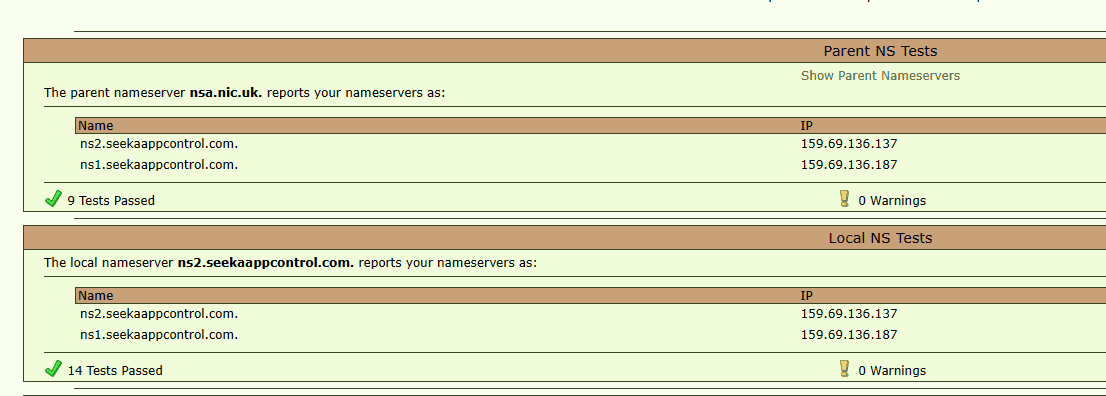
All the steps to connect your domain with our hosting is now complete. Please be aware that it can take between 24–48 hours for Ionos to update the nameservers. You can check going on leaf DNS and typing in your domain into the top search bar.
You want to see that the nameservers now match the ones you input into Ionos with checks that they have passed, like the image below.
Once these match you can now enable your SSL certificate and login to your site.
Enabling Your SSL Certificate on SeekaHost
- Sign into your SeekaHost.App Account.
- Select the WordPress Sites option from the dashboard.
- Click on the blue cog button on the right side of the site you want to enable the SSL for.
- Select the “SSL” option on this page.

- Now click on the toggle to enable your SSL certificate.
Conclusion
Once all this is complete, you can now login to your site and start editing! The connection has been completed with the Ionos domain, your SSL is activated to your site is secure and you can now start building your website.