How to Host WordPress Site in SeekaHost.app: Easy Steps to Host & Get Online Fast

By James Flarakos | December 22, 2022
Table of Contents

Find out how to host a WordPress site with seekahost.app in only a few easy steps and get online faster using the SeekaPanel to manage your WordPress hosting.
How Does WordPress Hosting Work?
Before we get into this guide lets first understand how WordPress hosting works, what is required and how you can get started.
Firstly, to use WordPress hosting you will need a domain. This is your website URL (example: www.mydomain.com) and its the way that visitors can find your website. Imagine this as the link to take any visitors your designed pages.
Your WordPress hosting can be connected to any domain, this means that whether you registered your domain with any other company or ourselves, you can still host your domain on WordPress no matter where the domain is registered.
Once you purchase your WordPress hosting, it will provide you with 2 nameservers. These are the important factors to connecting your domain and hosting together. By using the nameservers provided by your WP hosting, and inputting them into your domains nameserver area you can then make the connection so that if I search your domain, I will then arrive at the WordPress website you have connected it to.
How To Host a WordPress Site In SeekaHost.app
Before we get started I suggest creating an account for free first. This can also be done during the process of starting your hosting but by creating your profile first it will save you having to do so after choosing your WordPress package.
- Firstly sign into your account. If you don’t have an account yet, sign up. Its free!

- Now its time to choose your hosting package, do this by selecting “Hosting Plans” then clicking on “WordPress Hosting”.
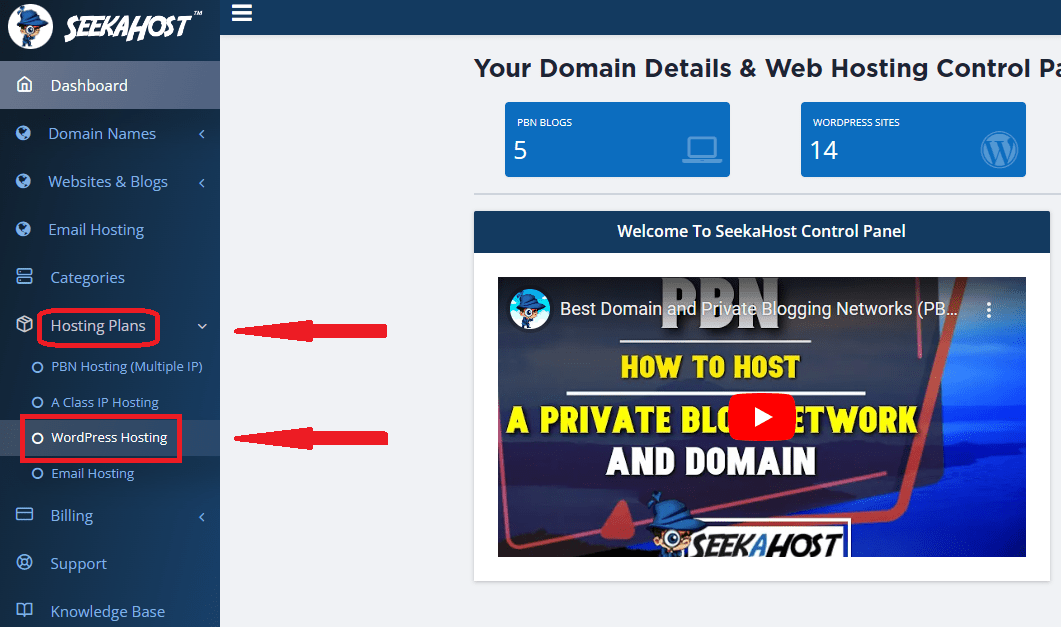
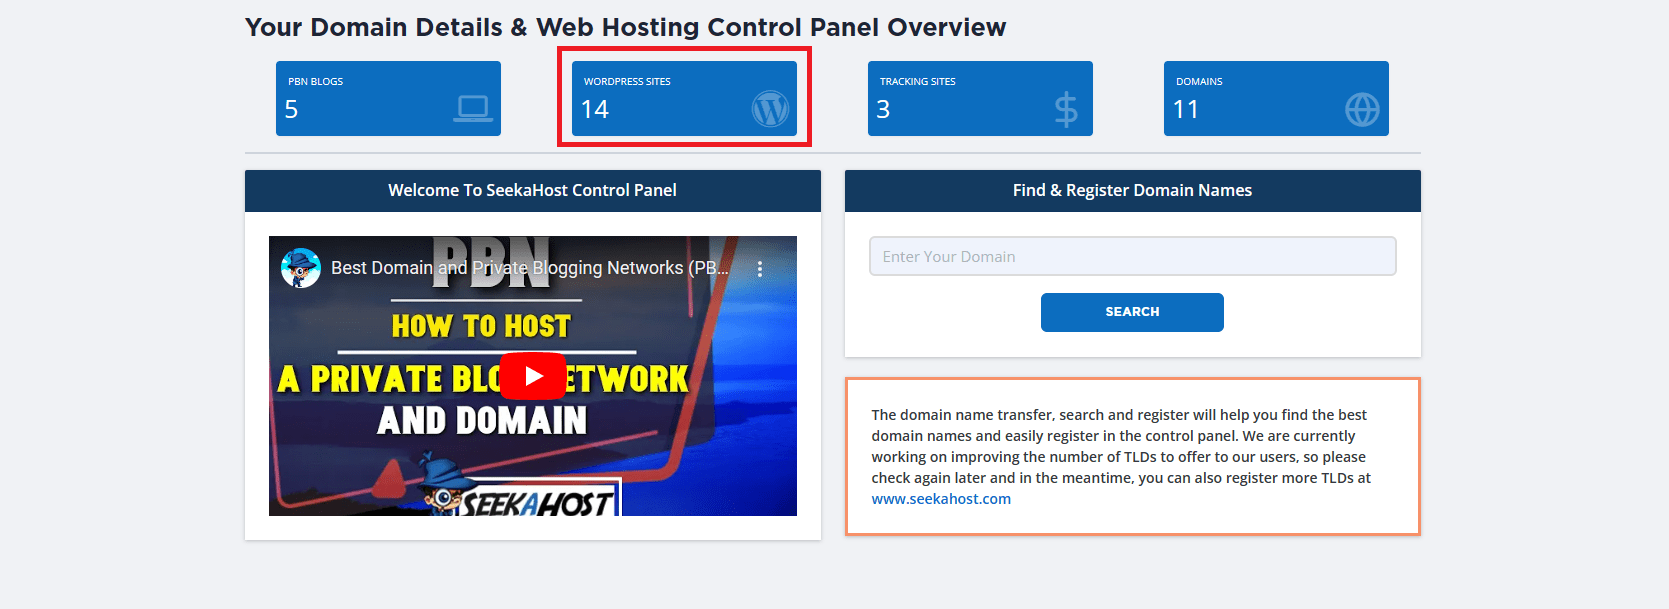
- Now we have our hosting package, lets start our WordPress blog by first selecting “WordPress Sites” from the main dashboard.
- Now select “Create WordPress Site” to add your website and start the first connection.
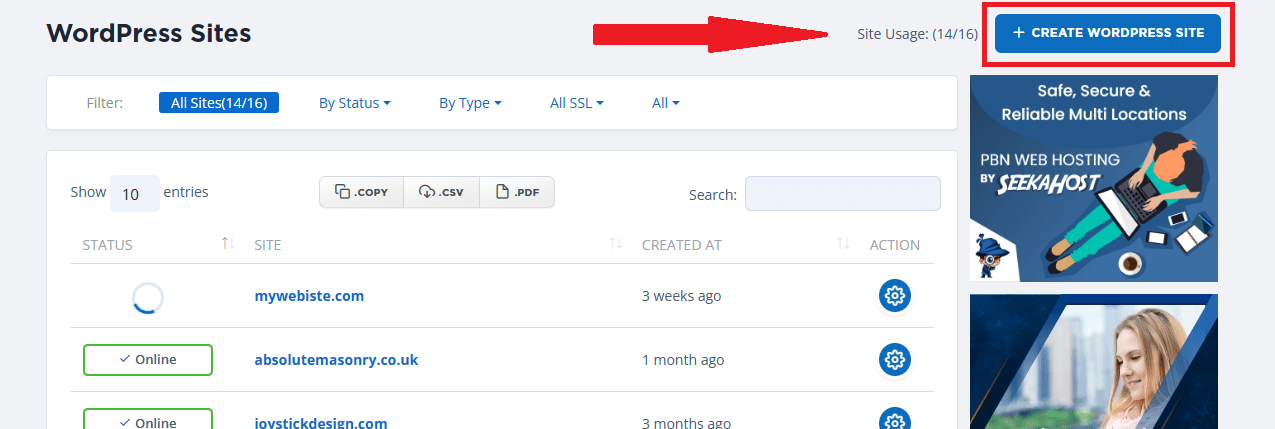
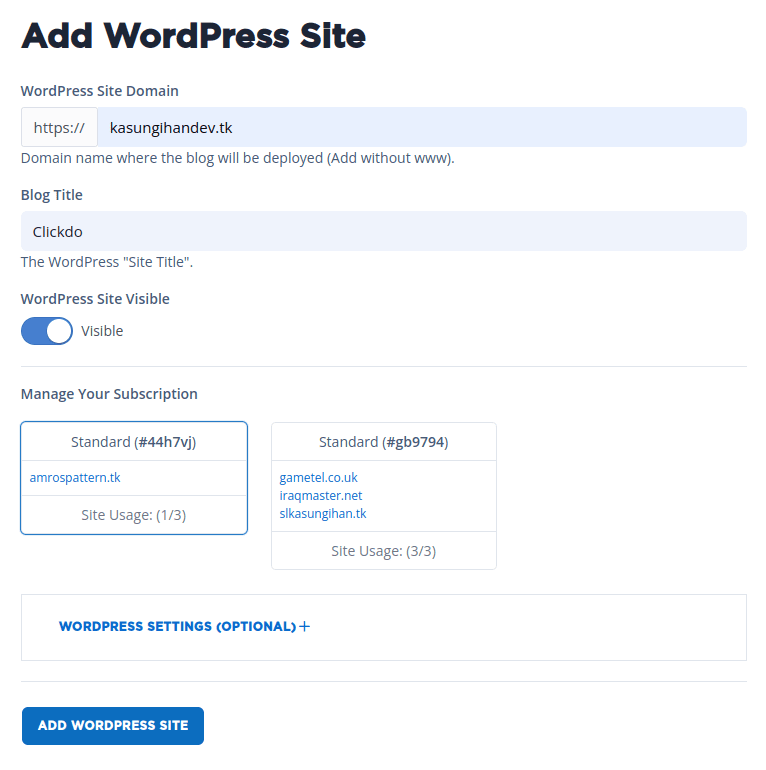
- On this screen, type in the name of your domain (with out the www.) and then a blog title underneath, this can be changed later. Then choose the hosting package you chose earlier along the bottom and press “Create WordPress Site”.
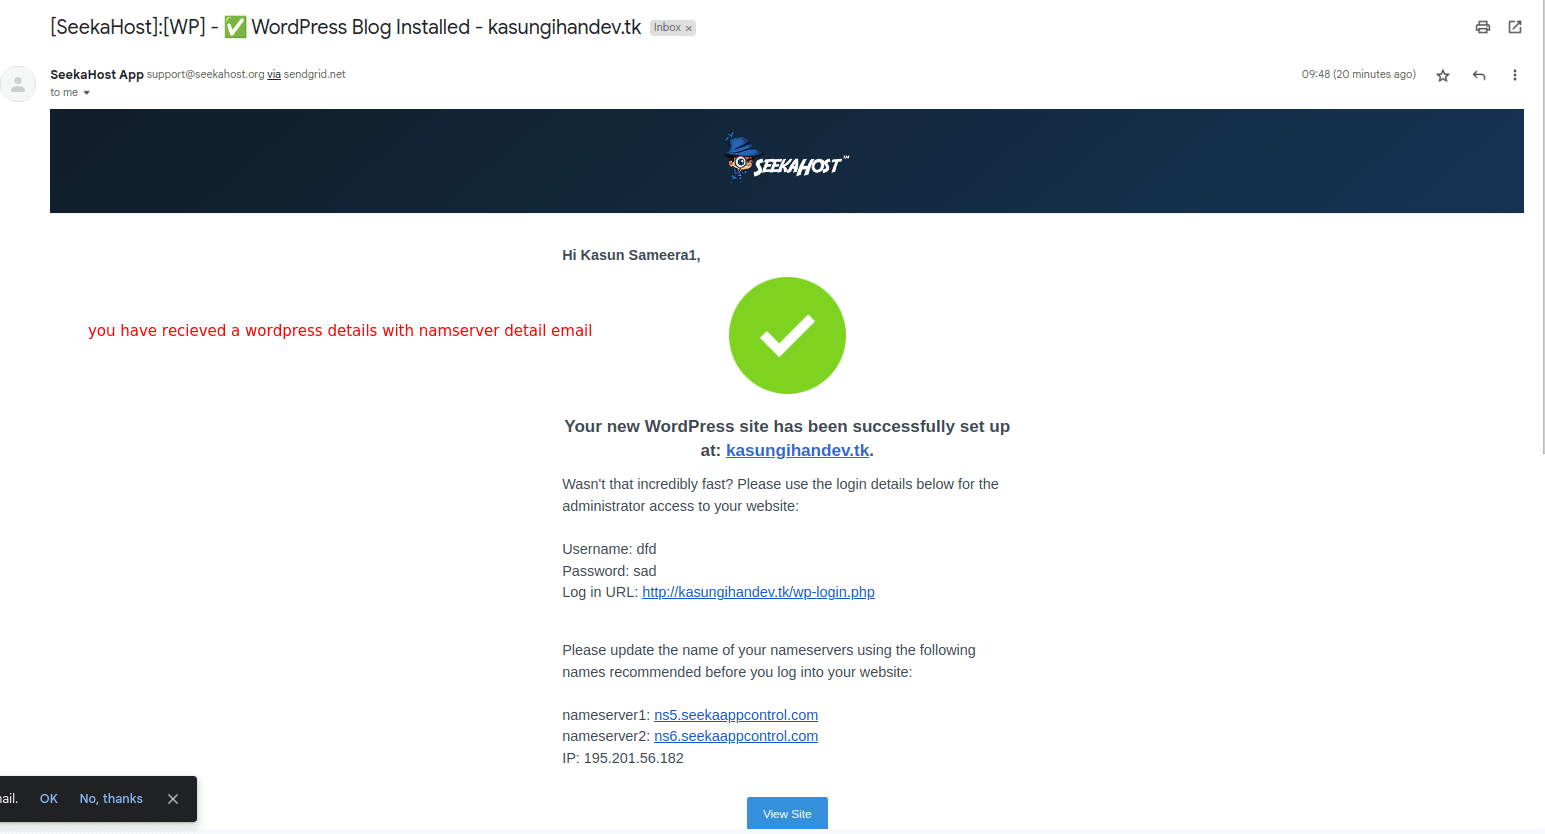
- The initial connection how now been made. You will now need to wait a few moments whilst this loads up. In the mean time you can also check your emails for confirmation of the blog starting and your login information.
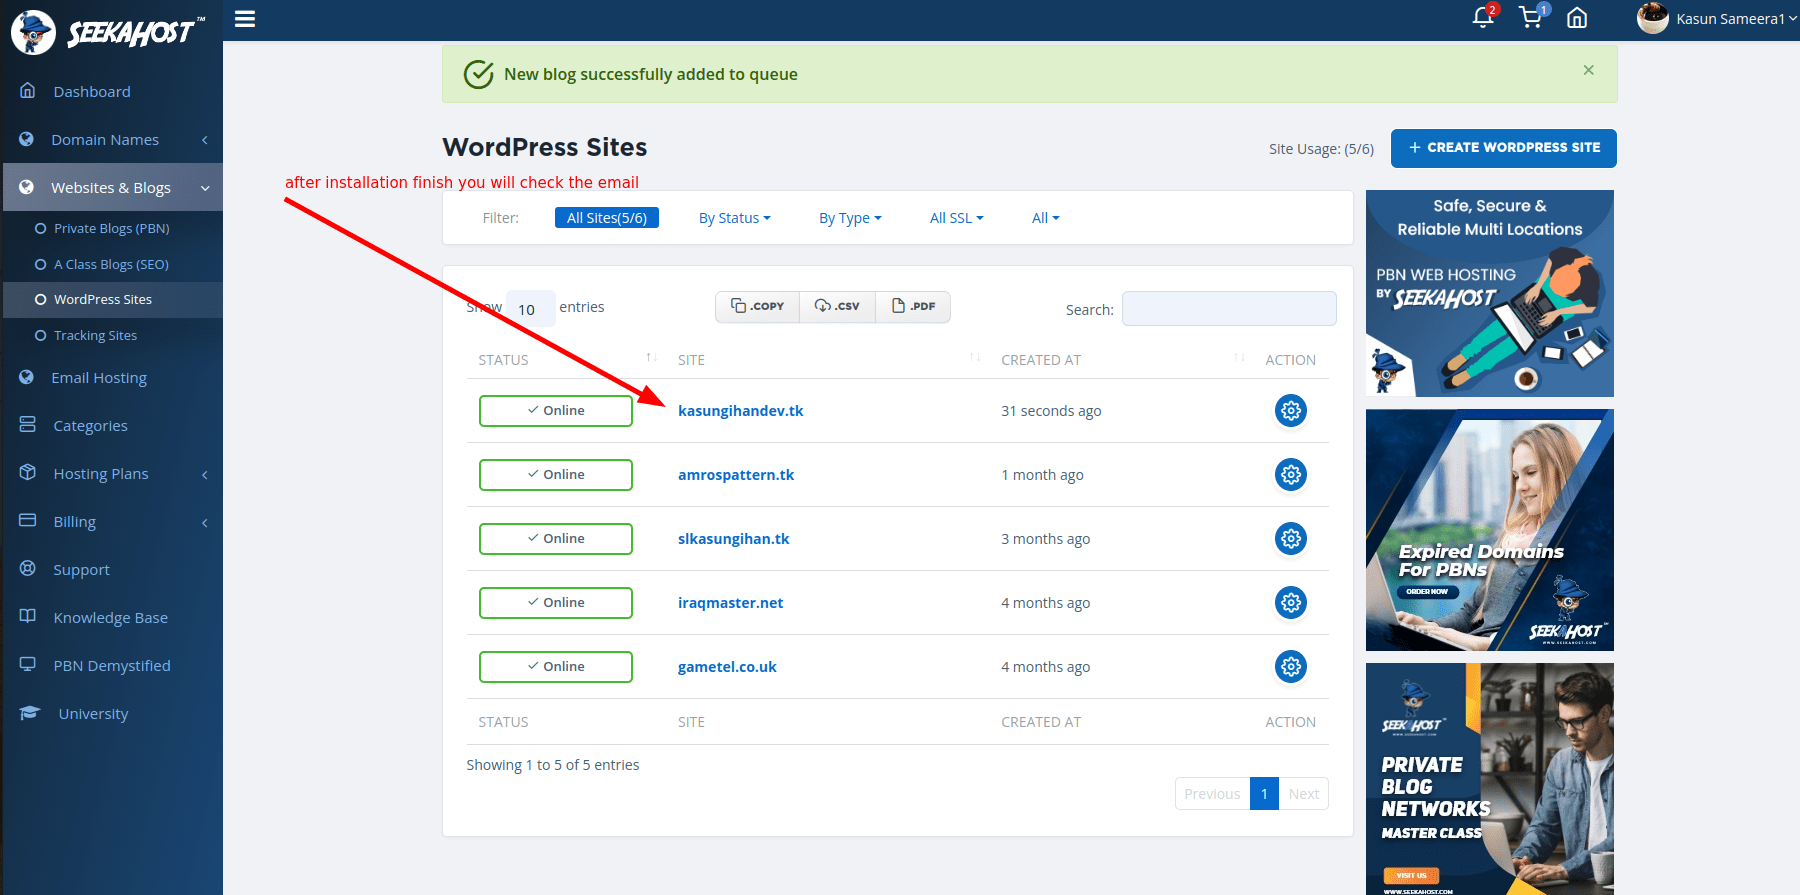
- Once loaded and it has the “Online” status showing, you can then click on the action button to the right of your site to go to the management page for the WP site.
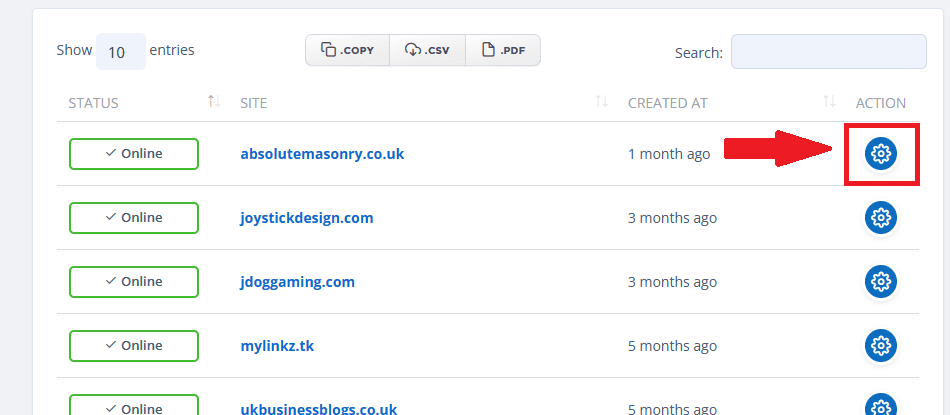
- Here you can find all the relative information for your blog, including your login details under the “Accounts manage” tab.
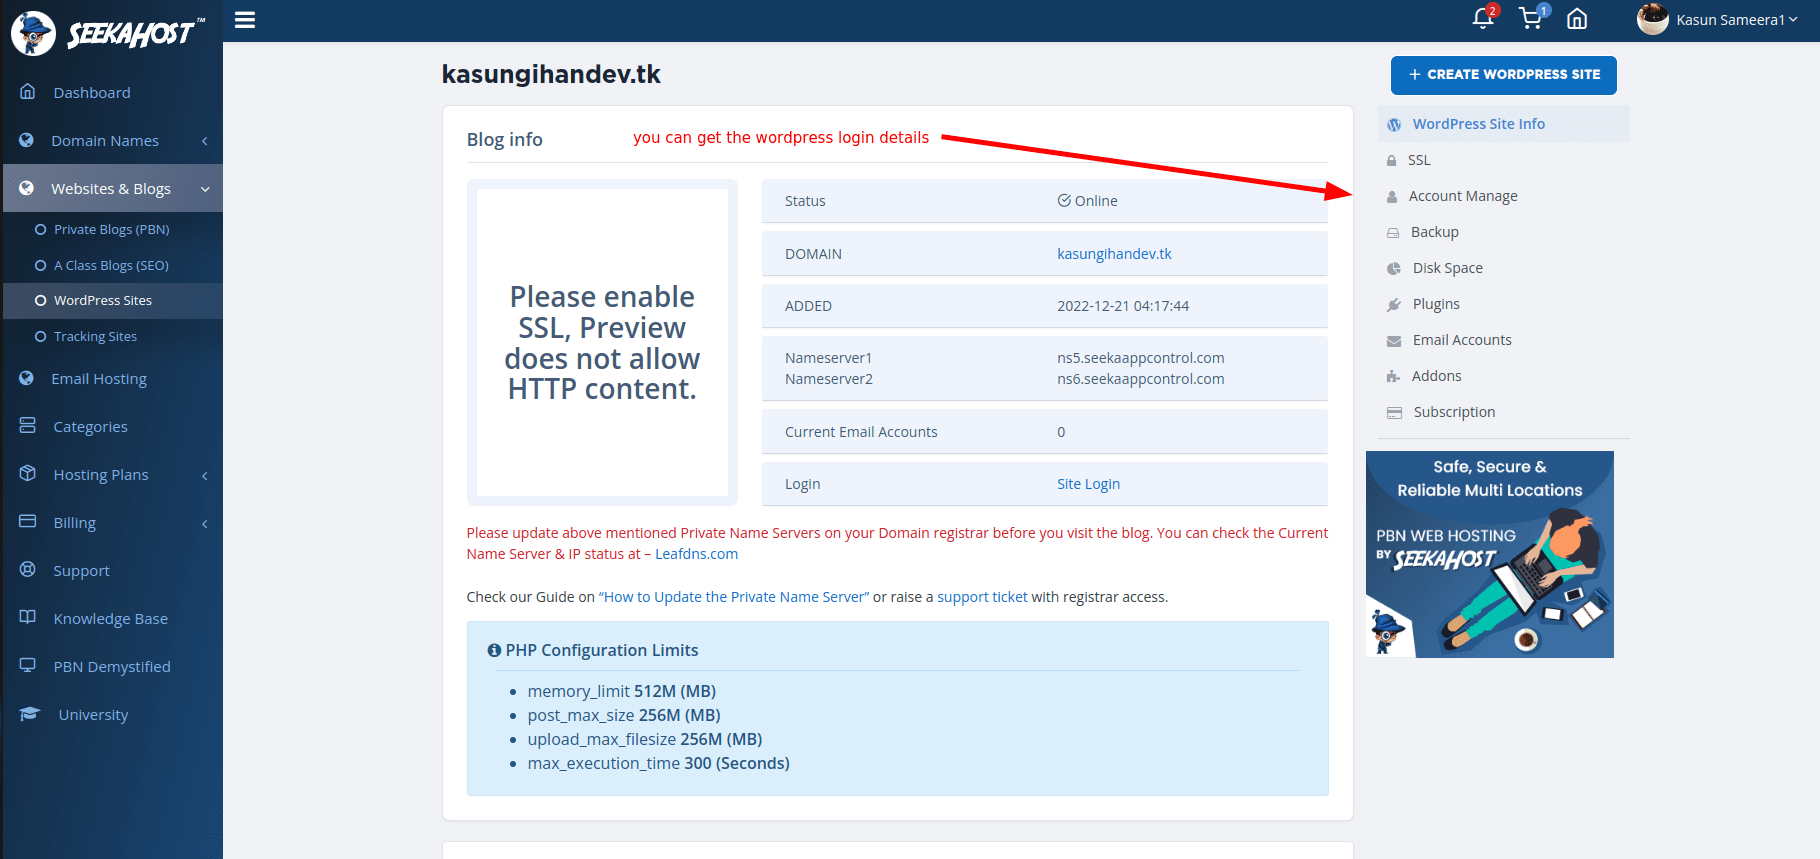
At this point we have two options. If you purchased your domain here with SeekaHost, no further steps are needed. The nameservers will already be set up as the default nameservers and its just a case of waiting between 10-30 minutes for the connection to be made. This can also be done by clicking the “leafdns” option on your management screen and looking for the nameservers sections to have two ticks next to it.

You can now use the “Site Login” button to log into the back end of your website or type your URL followed by/wp-admin and then login using your login details.
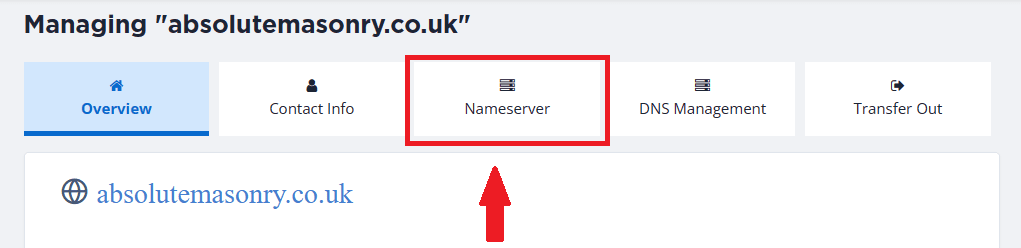
How Do I Connect a Domain From Another Registrar?
Its actually very easy and only requires a few steps that we will go through now. This will follow on from the guide above.
- Take the nameservers provided by your WordPress hosting and save them as you will need to copy and paste them shortly.

- Go to your domain registrar and find the “Manage nameservers” area. Change it from default nameservers to custom nameservers.
- Now simply paste your nameserver 1 in the top section, nameserver 2 in the section below it and then save your nameservers. Some registrars require you to unlock the domain before making changes then lock it back afterwards.
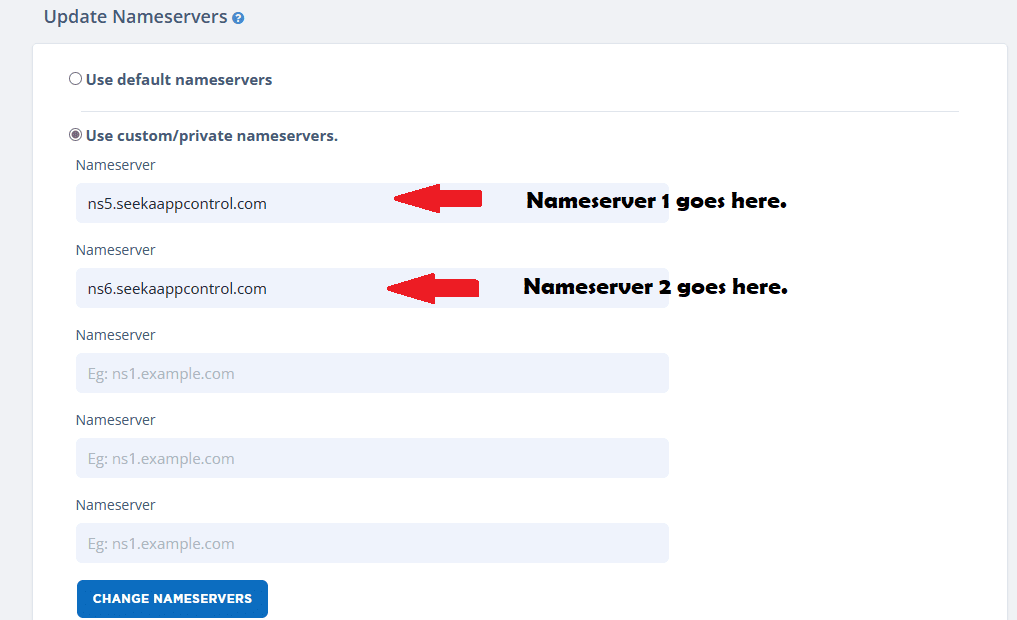
- Once saved, like before. Wait 10-30 minutes and you can also check by using the leafdns link on your WordPress hosting management page.
Conclusion
Getting online and hosting with WordPress only takes minutes to setup and can be done at home, on your phone and anywhere else! Once you have your domain ready its only a few more steps till your have your WordPress site online and you can start editing.