
How to Set up a Business Email Address with Gmail Account For Secure Email Delivery

By James Flarakos | November 25, 2021
Table of Contents
Learn how to set up a Business Email Address with Gmail account for free to get a more secure delivery system that doesnt leave your emails in the spam folder.
Why Use Gmail account For Your Business Email address?
Some of you might be wandering why you would go through the trouble of linking your domain email to a Gmail to create a business email?
The simple answer is as it will look much more professional when you contact customers or visitors with an email connected to your domain. And by linking it through your Gmail it will deliver securely to the recipient’s email rather than getting put in the junk/spam folder.
The Gmail can be called anything you wish as it will appear as your domain specific email. You can get a free email connected with your domain when setting up a WordPress site with SeekaHost.
The process is actually quite easy and we have a detailed step by step guide and video for you to follow so you can get your own free business email with Gmail.
How to Get Your Free Domain Email With SeekaHost
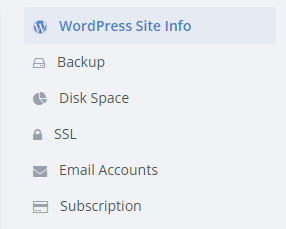
- Sign into your SeekaHost account and then navigate to your WordPress hosting page.

- Select the WordPress site you want to add your free email too. You do this by selecting the action button to the right of the website name.

- Select the “emails” option on the right of the page.
Please note that the email will be created based on your domain. You can add a prefix and it will end in your exact domain name.
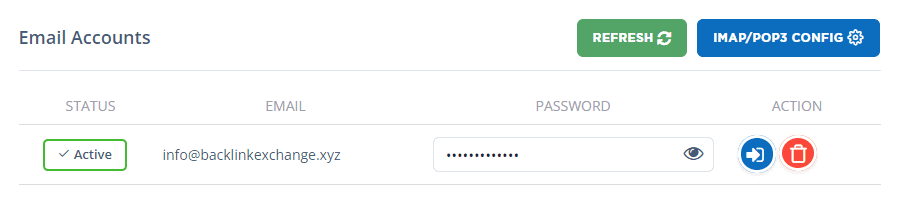
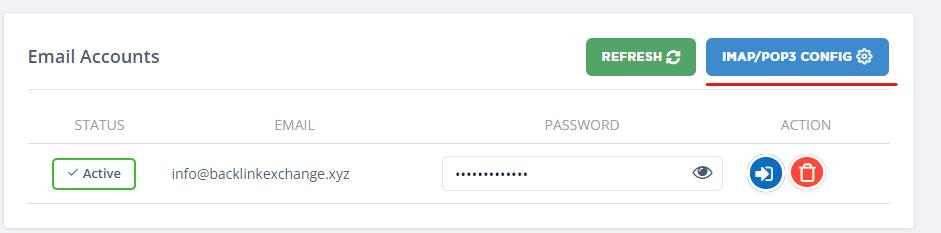
- Now simply select a prefix for your email address e.g. info@(yourdomainname) and a strong password.

- Once created you can log in using the the blue button next to the the password. An active sign will be displayed once
Perfect, now we have our free business email from our domain we can move onto the next step of creating a business email with Gmail.
For any c panel users, you will also need to follow the steps provided by your host to create your email for the domain.
How to Connect Your Email To Gmail For Secure Mail Delivery
Now lets get down to how to connect the two emails together so that the any emails coming from the Gmail account will show up as your domain email.
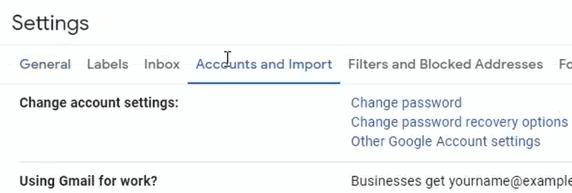
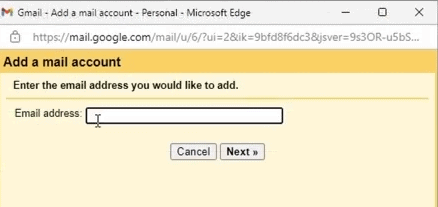
- From the Gmail email account you want to link, go to Settings on the top left and then See All Settings.

- Select Accounts and Import.
- Now click on Add An Email Account.

- Now insert the email you have created with your domain/hosting. Eg [email protected], then click on next.
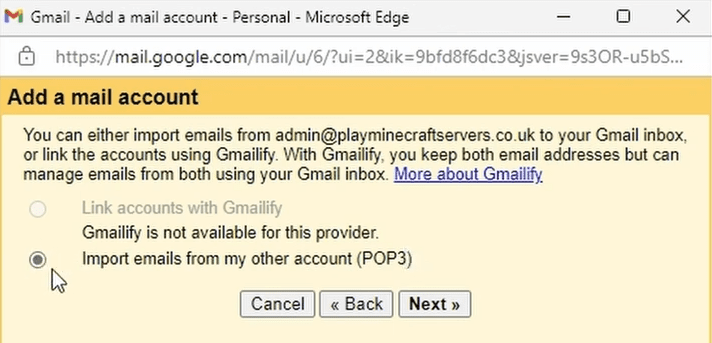
- On the next page select Import emails from my other account (POP3).
- For the next step you will need to gather some information about your domain specific email.
- Username – This is your domain specific email, for example info.mywebsite.com.
- Password – This is the password your created for the domain specific email.
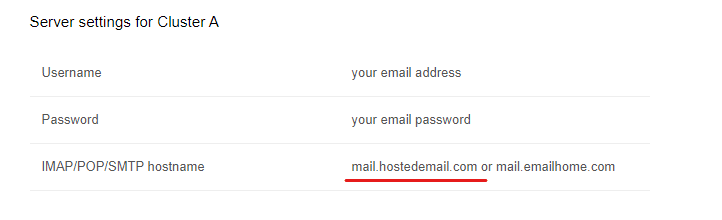
- POP Server – You can find this by selecting IMAP/POP3 config from your email creation page on SeekaHost.
– Then selecting Configure an email clients Details
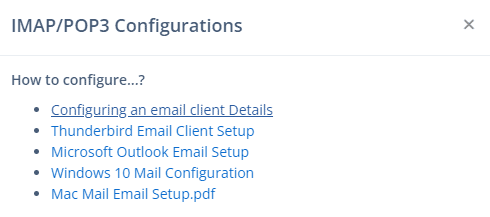
– And use the one provided in the Cluster A picture below.
For C panel users you need to look for Incoming Server details and use the one provided there.
- Port – Your port will be 110.
- Check the Label incoming messages.
Now your can continue to the next part by clicking on Add Account.
- Select Yes I want to be able to send email as (your domain specific email).
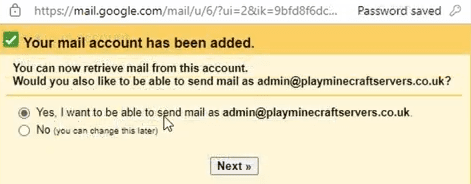
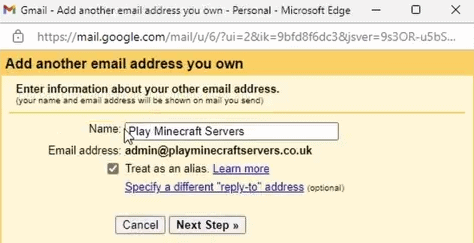
- Its time to add how your email will appear to others when they receive an email.
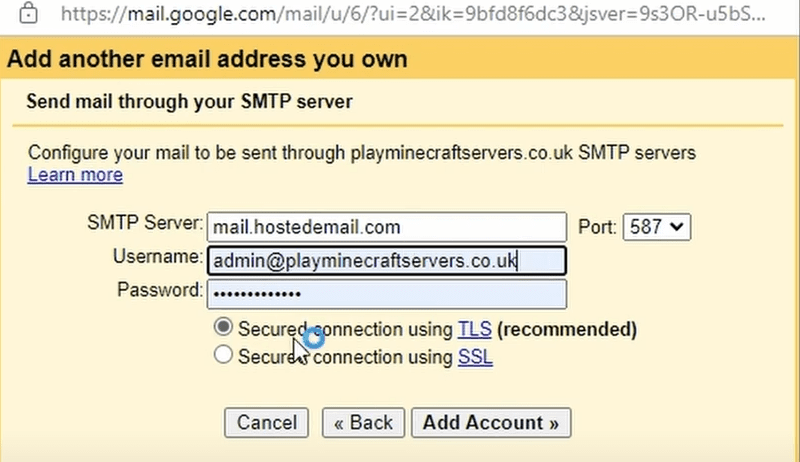
- Next up its time to insert your outgoing server information.
- If your with SeekaHost thats super easy. Its the same as the previous server and found on the same page. mail.hostedemail.com
For C panel users you can find this in the same page you got your incoming server information for your domain email. - Username is your domain specific email address.
- Password is your password you created for that email.
- Select the Secured connection using TLS
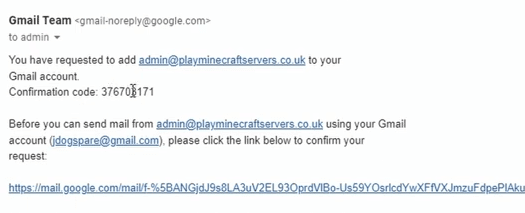
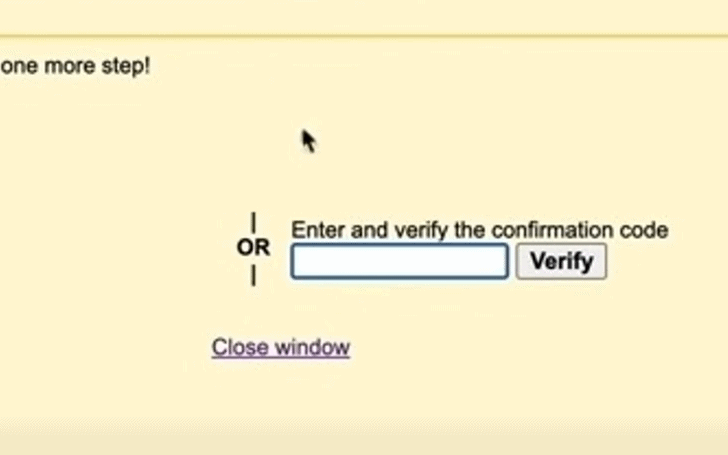
- Finally, check your Gmail account for a confirmation email (can take up to 5 mins). Copy the code given to you and then follow the link provided to confirm your account. Please note if your email isnt working after you might need to re confirm using the same link again.
- Insert the numbers you copied into the google email box and verify. After you have done that the window will close down automatically.
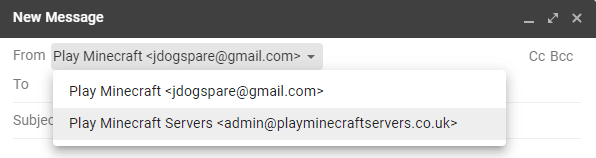
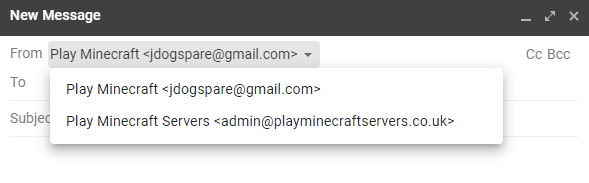
Now to send a email as the domain specific email simply select the email you wish to send from when creating a new email.
Conclusion
This free method is by far the easiest and best methods of getting my emails from my domain to be received in the clients inbox and not get marked as spam. Using the security of Gmail and masking it as your domain email you can securely send emails to clients and make sure your still looking professional with a business email.
Also by using the email provided with WordPress hosting with SeekaHost your able to do it much faster and easier than other hosting companies using C Panel.