free data analytics integration for wordpress

Free WordPress Site Analytics in SeekaHost.app with Clicky & Google Integration for Data Tracking

free wordpress site analytics

Adding website analytics that are accurate is essential. You can use the data to determine what pages or posts are doing well and what you can improve on.

Google analytics and Clicky analytics are some of the best ways to analyse your visitors. They are accurate and free to use (up to 1 website with Clicky). We will also go though how to install them both on your SeekaHost dashboard at the end of this article.

The SeekaPortal is a custom designed dashboard that allows users to manage their Domains, WordPress sites and Tracking sites much easier and cheaper than cPanel.

What Is Clicky and Google Tracking Integration?

They are both well known Analytic data tracking features that can give you accurate information about what visitors have done on your website. This includes identifying where the visitor entered, how many actions they took on your site and also tracking where the exit was.

This can of course give you some great data on where to improve, or potentially how to improve the flow of traffic or direct it to somewhere that is more beneficial. You can also track how many visitors you have had per day, or any other date range. As well as that, the time spent and really a full breakdown of what each visitor has done from the second they entered your website.

google and clicky analytics integration

The way we have integrated this by adding the option to see the information on your SeekaHost dashboard with out having to log on anywhere else. Meaning everything you need to manage is in one easy place. From this area of your “Tracking Sites” you can set up an unlimited amount of tracking sites and have all your analytics in one place.

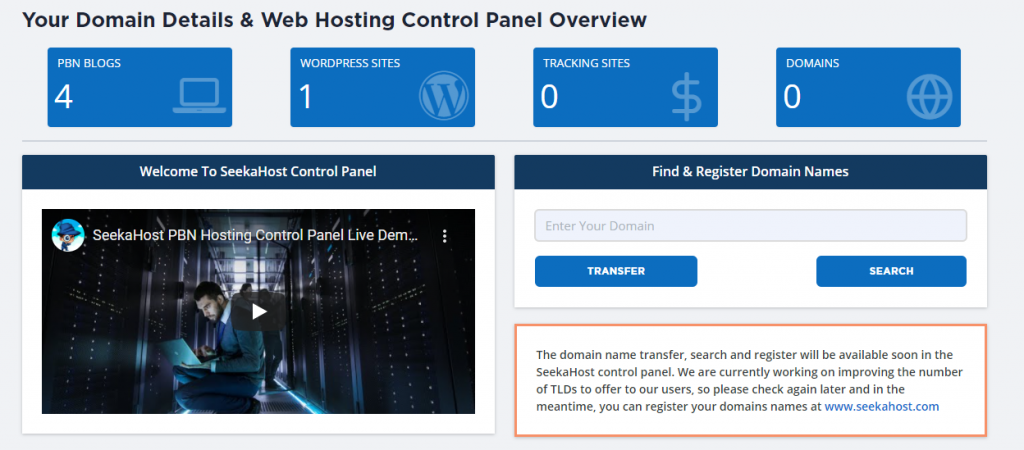
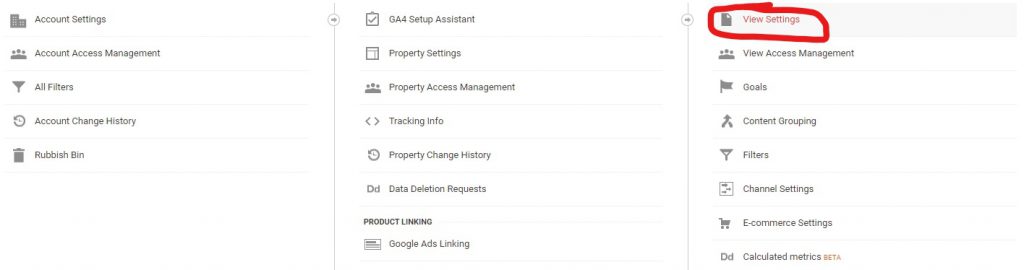
Where Can You Find The These Features on The SeekaPanel?

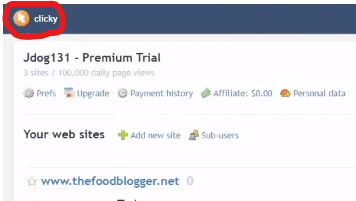
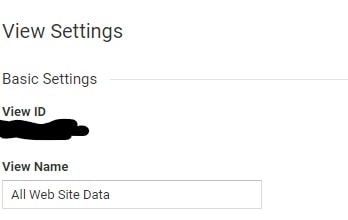
When you start hosting with SeekaHost.app you will find an option on your dashboard called “tracking sites”. This comes free with any of our hosting packages. From here you can go ahead and add Google and Clicky analytics to your domain you have hosted. The process doesn’t take that long and once setup you don’t need to do anything after that. I have had my sites setup for a number of years personally with out ever having to configure anything after the first setup.

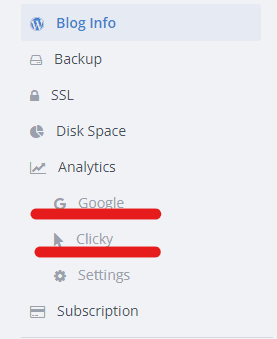
We give you the option to add either google, clicky or both analytics to your tracking site so that you see the results in one easy place.

google and clicky analytics for wordpress

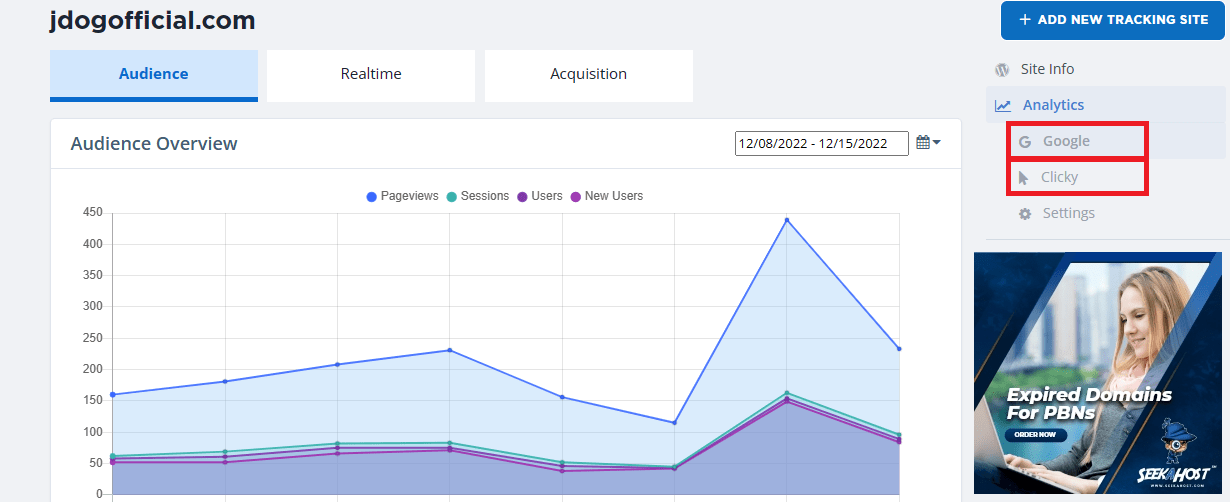
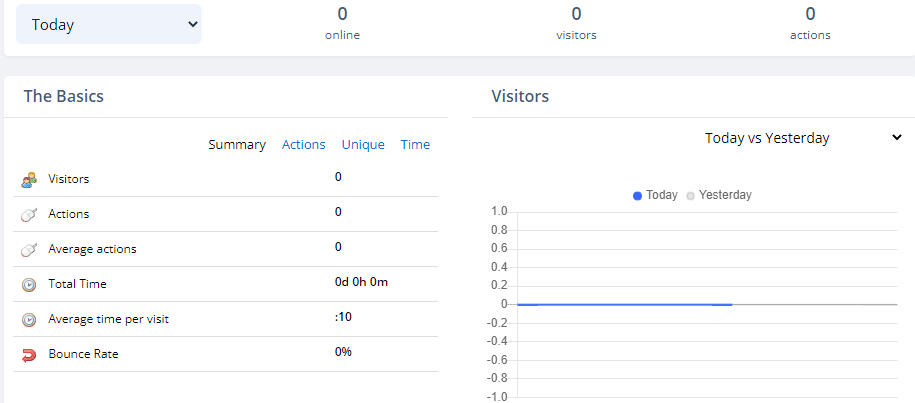
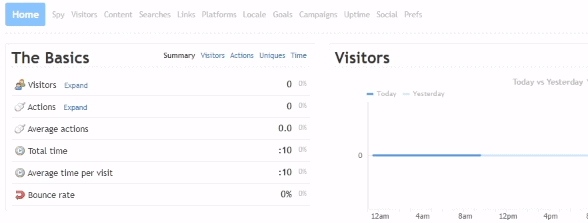
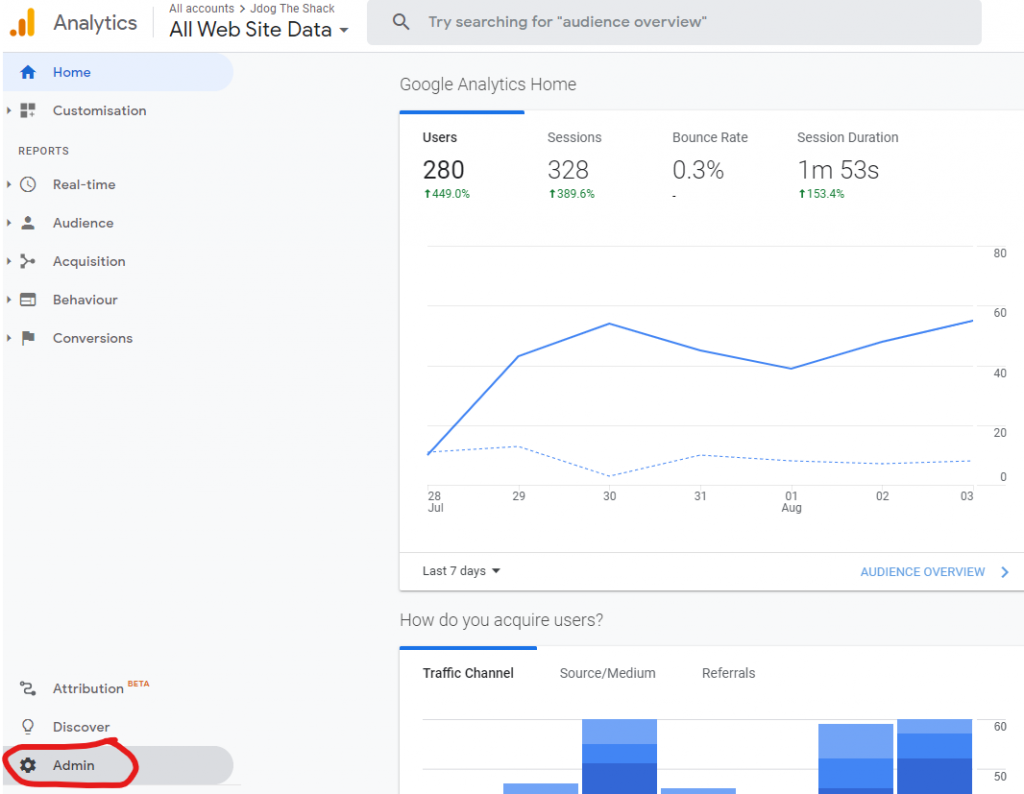
You can choose to see the “Audience Data” the “Realtime Data” and “Acquisition Data” for the google analytics, giving you clear and up to date analytics of your wp site. The clicky analytics display just as they would on your clicky dashboard with visitor numbers, steps taken ect.

Why Use The Analytics Integration On SeekaHost.app?

The main reason to use this free service is to make it easier on each user to find the analytics in one place. Sometimes it can be hard if you have multiple websites, with different emails or potential using different plugins. So to get your different sites analytics can mean logging into different accounts and taking up to much of your time.

By having all the best analytics in one place on your dashboard, you can access it and see all your sites data in one place. This is easier to compare and use in a beneficial manner. Its also a great way to try different optimizing plugins or page builders on WordPress and seeing their true benefit compared to other plugins.

data tracking analytics integration

We want all our customers to get the best out of their website and by giving you this free tool that other hosting services simply don’t offer, you can use it to succeed and make yourself much more optimised by the data of your past visitors.

By identifying where customers come from and where they exit, including how long they spent means you can make an educated decision on what might elongate their time on the site or what potentially made them leave. You can find out whether they found what they were looking for and if not, you can make sure that they do in the future.

How to Add Site Analytics Data Tracking For Free?

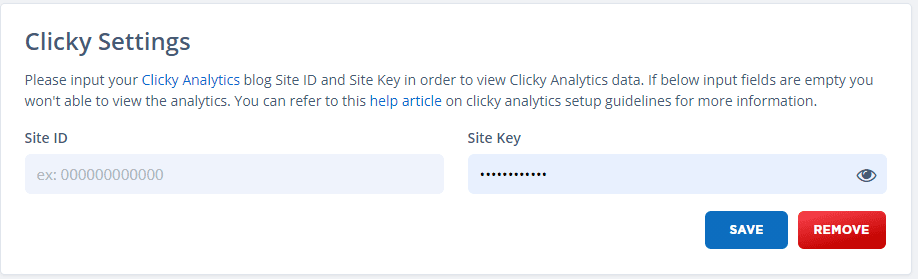
Its easy and free to get started with integrating your website analytics with Google and Clicky. Just be aware that although google allows your multiple google analytic accounts, clicky will only allow 1 free account per customer.

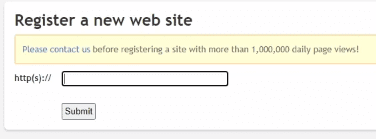
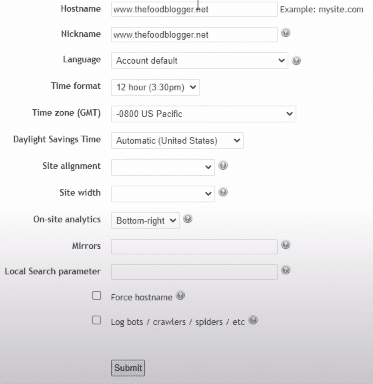
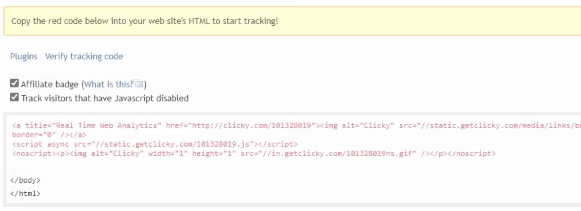
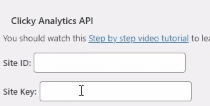
We have a full tutorial here on how to setup Clicky Analytics for your WordPress site or multiple IP blog. You get tracking sites for free with all our hosting so no matter what size you have up. You also get the free tracking feature also.

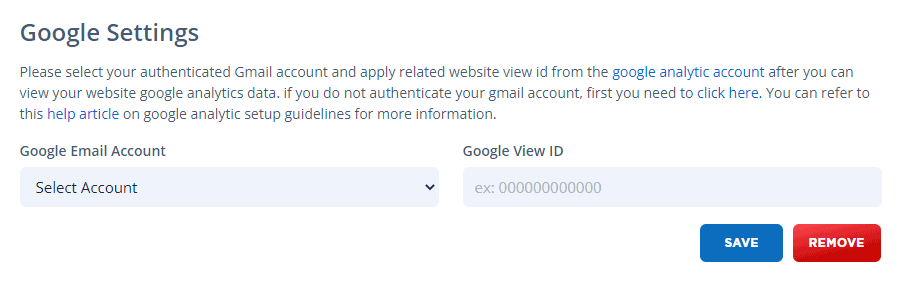
To setup your Google analytics on the SeekaPanel also only takes a few steps and we have a full tutorial here on how to setup your Google analytics on SeekaHost.

Alternatively you can also use the video below and follow the steps to connecting up your analytics to your dashboard.

Conclusion

As previously mentioned, once setup thats it. No need to maintain, update or check its working. It will simply work going forward with up to date and clear analytics from your dashboard. This is a much easier way that logging in to Clicky dashboard or the Google analytics dashboard. Its even easier than connecting up to monster insights and it comes with out any limitations. Once you can see what exactly visitors are doing, you can use this important data to improve your website and fully optimise it.

By tracking where a visitor has entered, and where they went you can identify any problems areas or perhaps easier navigation for the visitors to find what they wanted. The better experience your visitors have the better for your SEO and will inevitably lead to better search engine rankings as long as your also providing good content.

how-to-connect-google-analytics-and-clicky-with-seekapanel

How to connect Google Analytics and Clicky Analytics to SeekaPanel?

Did you know that you can conveniently integrate your Google Analytics and Clicky accounts to keep track of your website’s performance within your SeekaPanel dashboard?

It’s easy to do and can save you a lot of time so let’s go through how to add Google and Clicky Analytics to our SeekaPanel on SeekaHost.

In the video below you can see how to read site traffic and domain visitor data in SeekaPanel by connecting Google Analytics and Clicky Analytics.

Clicky analytics

Connecting Google Analytics and Clicky Analytics to SeekaPanel is Easy & Effective

This is one of the great features we include for free here at SeekaHost. You can connect your Google and Clicky acount to our main dashboard meaning you can check analytics for your SeekaHost Dashboard before even login in to your sites.

Keeping a keen eye on your analytics is key, as you can track traffic. What pages or posts are doing better and most other data that will help you grow and push certain areas of your site.

We will also go through how to find your google view key, you Clicky site key and also your Clicky site ID.

1.Where Can I Find my Analytics On The SeekaPanel

Start by selecting PBN Blogs from the dashboard.

changing nameservers on seekapanel

From here choose the Blog you want to connect analytics too.

private-blogs-hosted-in-SeekaPanel

Now select either Google or Clicky to View or Connect Your Google and Clicky Account.

add Clicky analytics

2. How to Connect Clicky Analytics To Your SeekaPanel.

Using the previous step to find your SeekaHost Analytics option. Go ahead an select Clicky. You will be asked for your Site ID and Site Key.

Clicky analytics settings

Now head on over to Clicky to create an account. You get a free plan for 1 website but have the choice to upgrade later on if you so wish. Once you have created an account then register a new website. Just type in your complete URL with out the “https://”

how to register site on clicky

Next up, go through the configuration options for your time zone, display date ect and press submit.

how to configure Clicky analytics

It will then ask for to insert the code into your HTML. If your using WordPress, simply choose the plugin option on the screen or use this download link to download the Clicky Analytics plugin to insert the code for you.

Install and activate the plugin you downloaded, then open the settings screen for the Clicky Analytics Plugin and keep it open as you will need to add your Clicky Site ID and Site Key shortly.

Clicky analytics

Once you have uploaded the plugin you ca go back to the last Clicky page and select Verify tracking code.

Most of the time you will get a successful message, if you dont it doesnt mean it hasn’t worked. If you have followed all the steps so far it might just be failing the test. How ever if you visit your Clicky home page you should now see analytics for your site or blog. Meaning it is now connected.

Clicky homepage

To get the Site ID and Site Key you will now need to click the Clicky Icon on the top left.

connect Clicky analytics

On the bottom left you will find a small sections with the Link called Prefs in it. Click on that link.

Clicky preference

You can now find your Site Key and Site ID here. Just first copy ad paste them into the settings of the plugin no your WordPress that you left open earlier. Then we will go to the last step of installing Clicky analytics and connect it to our SeekaHost dashboard.

Go back to your SeekaHost page on the Clicky Analytics and insert the Site Key and Site ID into the relevant areas. Then Click Save and your Clicky Analytics can now be viewed through your SeekaHost dashboard.

Clicky analytics settings

3. How to Connect Google Analytics To Your SeekaPanel?

To add your Google Analytics, go back to your Blogs info page in the SeekaPanel and select Google under Analytics Option.

google analytics settings

Select the Google email account to connect too. Please be aware that to connect Google analytics to you email must match your email your registered the domain with. Press the action button next to the domain to go to the next step.

Then its time to add in our Google View ID to connect our analytics. To do this, open up your Google Analytics page with the correct property chosen. (the domain you are connecting)

Now select the Admin option on the bottom left.

how to find your google view id

Under the View All Website Data tab, select View Settings.

find google view id

Here you can find Google View ID Copy it, ready to paste.

how to find your google view id

Now go back to your SeekaHost dashboard, select your Blog and press action. And finally select Google, under the analytics option. Unless you left the page up form earlier. Simply select the correct email for your google account and paste in the Google View ID. Then Press save and you have now connected both your Clicky and Google Analytics to your Blog.

google analytics settings

You can check the data on these at any time by selecting the blog and coming over to the Analytics option. From here just choose whether you want to check out Clicky or Google and look through all your analytics.

add Clicky analytics

Thank you for taking the time to read this guide, we hope it has helped with installing analytics to your SeekaPanel and for any more information or help feel free to create a ticket or ask our live support team from the homepage.